A BIG THANKS to all who came out on Sunday and rocked it all class. It was an amazing turnout and the energy was off the charts. I could not have done this without the incredible support of my friends and family, and my rock star photographer aka husband. This was our first huge event we planned and we pulled it off. I am so inspired to do something like this again. Thank you, thank you!
Posts filed under events
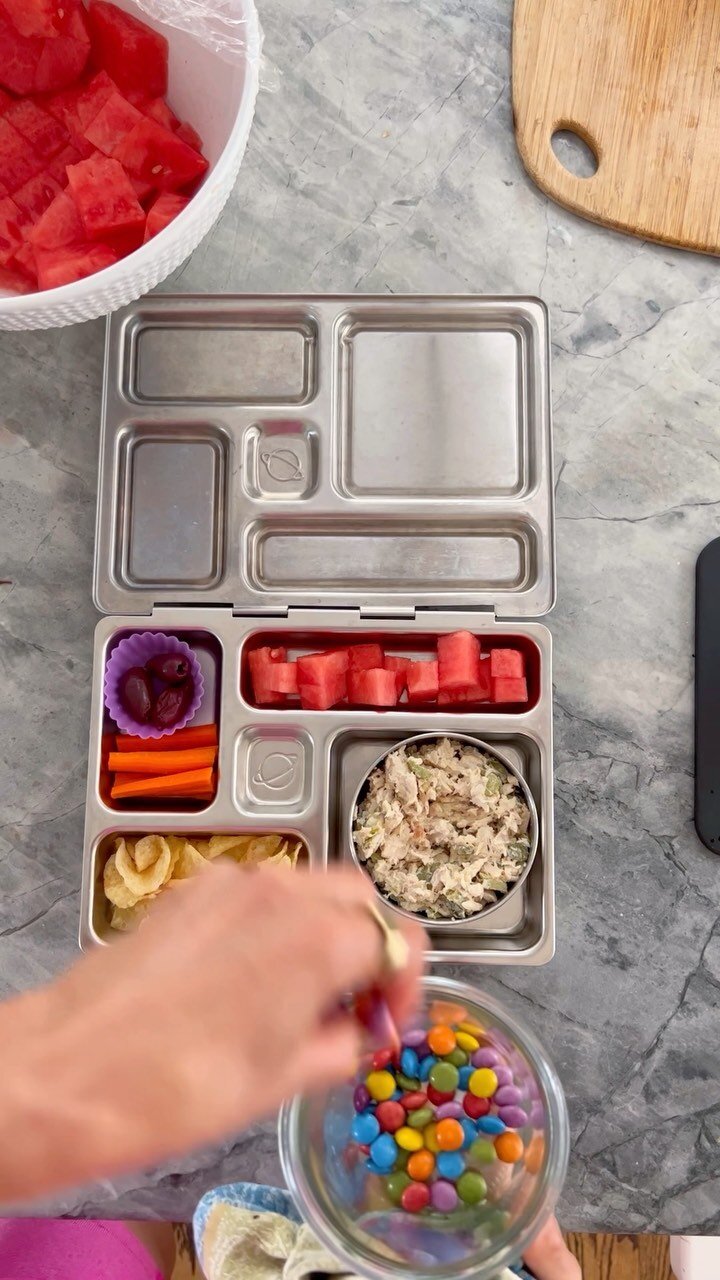
Three products I am loving this week.
1. Coolest Yoga mats I have yet to come by! I really enjoy pretty things. I enjoy vivid colors and anything that will make someone smile. These mats are just that! Stand out a bit in your next class with these unique prints. These mats are just awesome. Each print is hand painted first and then they are sustainably printed onto non-toxic, phthalate-free, yoga mats.
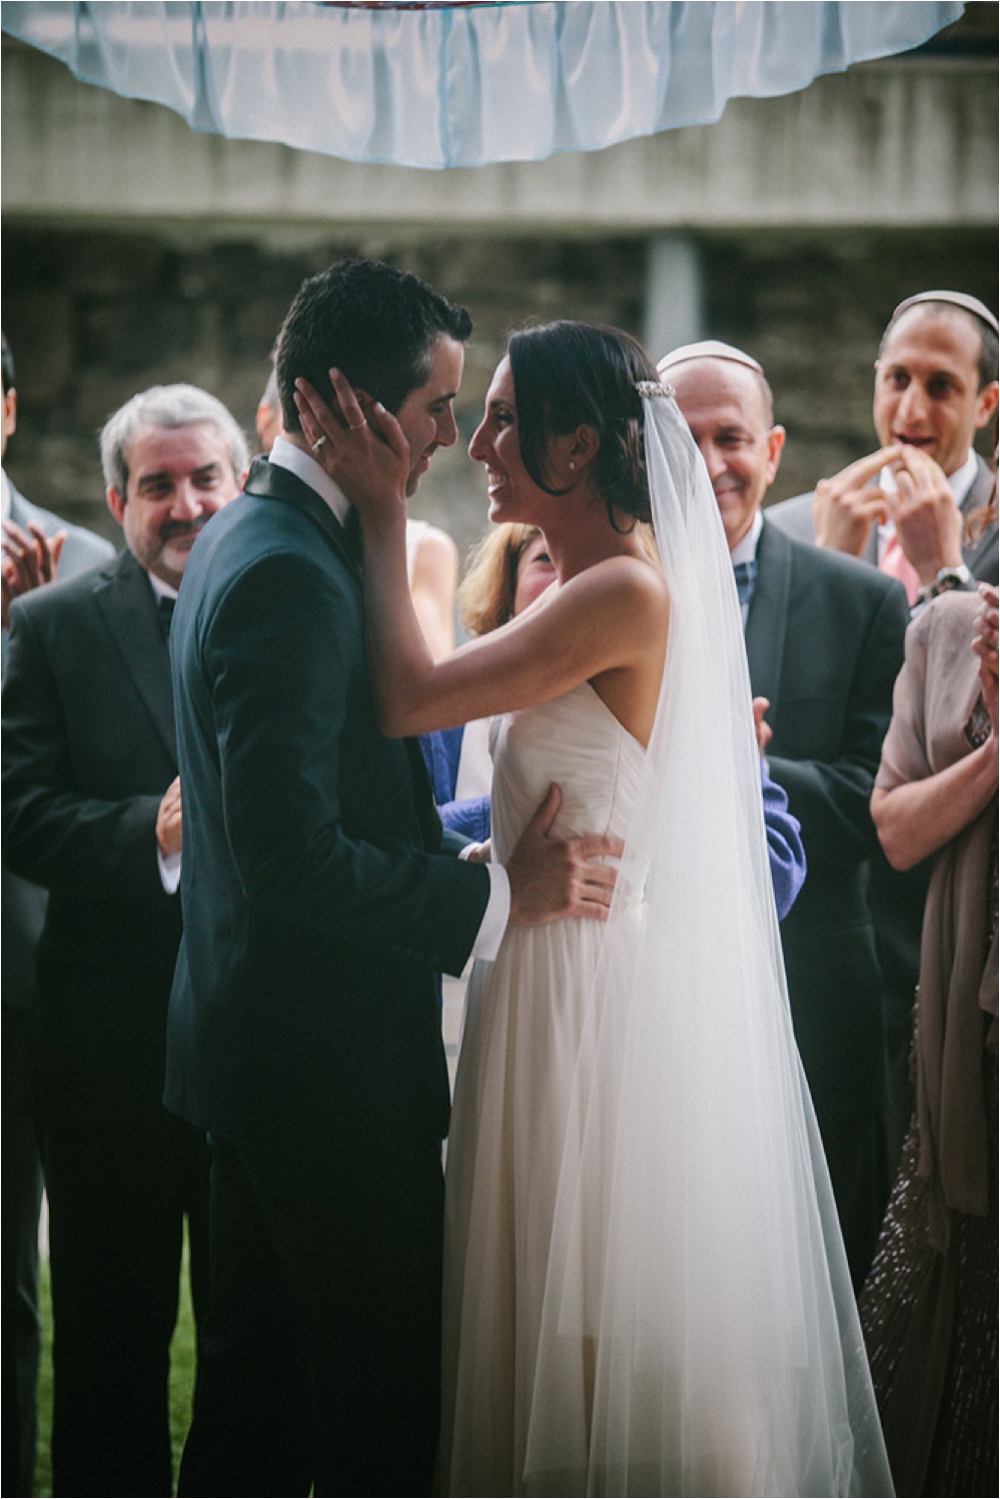
How I personalized my wedding

Image
First let me explain that my wedding venue was a raw space. That means we just rent the space (an artists loft with a cool garage door and high ceilings), and then we have to hire out for everything else. EVERYTHING. Or you could do it on our own. I was SO excited to take on this challenge. I knew there would be more DIY projects than normal, and a lot more effort to make the place look special, but I think I have a pretty good vision on things and a good team to support that vision.
I always appreciate DIY projects. Yes, it takes more effort, and sometimes it does not save you THAT much money, but I love them because you are able to put your personal touches on something and say "yes, I did THAT!" But sometimes, I do have to say, that dishing out some extra money to keep sanity, and have someone else do the work is worth it as well. Especially when you have a million other things to think about.
My advice: Pick a few DIY projects and do them right. Make them STAND OUT!
I was very lucky to marry into a very crafty family. In fact I just thought up of and organized most of the DIY projects, and did very little in DOING them. My sister in law, Erika, did most of the doing. She rocks! She lives in NYC and does free lance art stuff. She can build anything you want her to, and just has an eye for making things look awesome. Thank you Erika. This wedding would not have been so sexy without your magic touch.
Before we start, I want to make a shout out to the BEST PHOTOGRAPHER EVER! Abby Lorenz is talented, professional, smart, incredible at what she does, and can execute like no other. I do not know what I would have done without her! All images are © 2013 Lorenz Photography. (some are taken from phones, but I think those pictures are obvious!)
My Veil
Image
I knew I wanted a drop veil. I wanted something simple without a poof. I love the simplicity but elegance of a drop veils. My mother in law had never made a veil before but she knows how to sew. So she looked up a few tutorial videos, measured me, did some test veils and then BAM she made a veil.
Tulle is not expensive, so I was always so confused on how bridal shops can charge $500 for a veil! I ended up getting swavorksi crystals and attached that to a clip that was attached to the veil. Total cost about $60. The veil was so special to me, knowing that it was made by my NEW mom.
Image
My headband
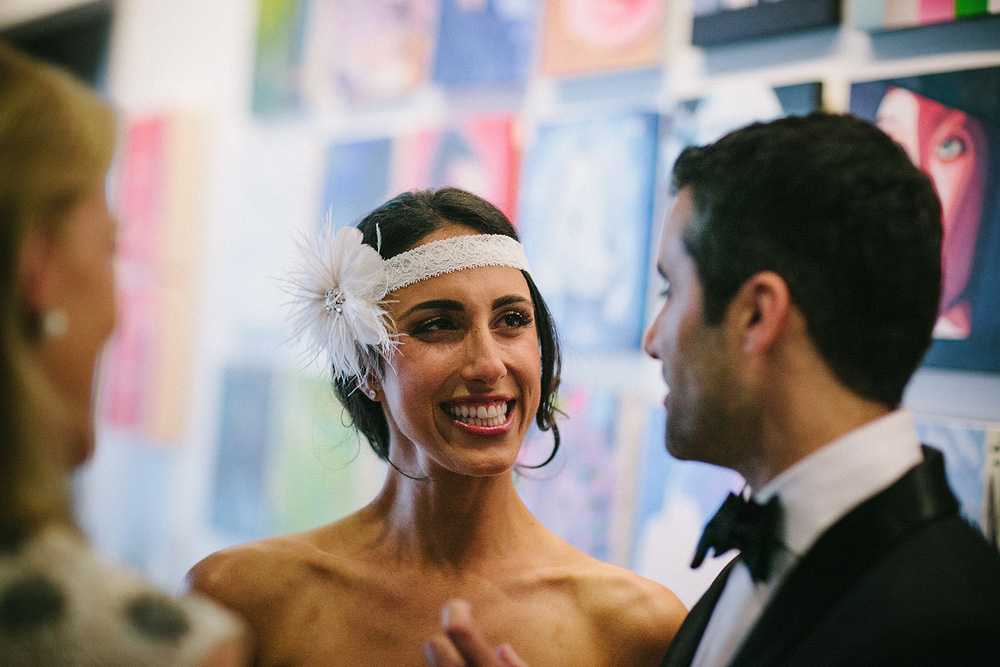
Image
Since my dress did not have any "bling" I knew I wanted to spice up my attire with my accessories. I wanted to change accessories rather than dresses. For cocktail hour I wore a fun flapper-like headband. I bought the flower off Etsy ($50) and I bought the actual fabric for the headband in NYC (under $20). The flower had a clip on the back so it was easy to attached to the headband. My mother in law sewed the two ends of the material to make a head band and I just clipped the flower on. Tada, totally different look.
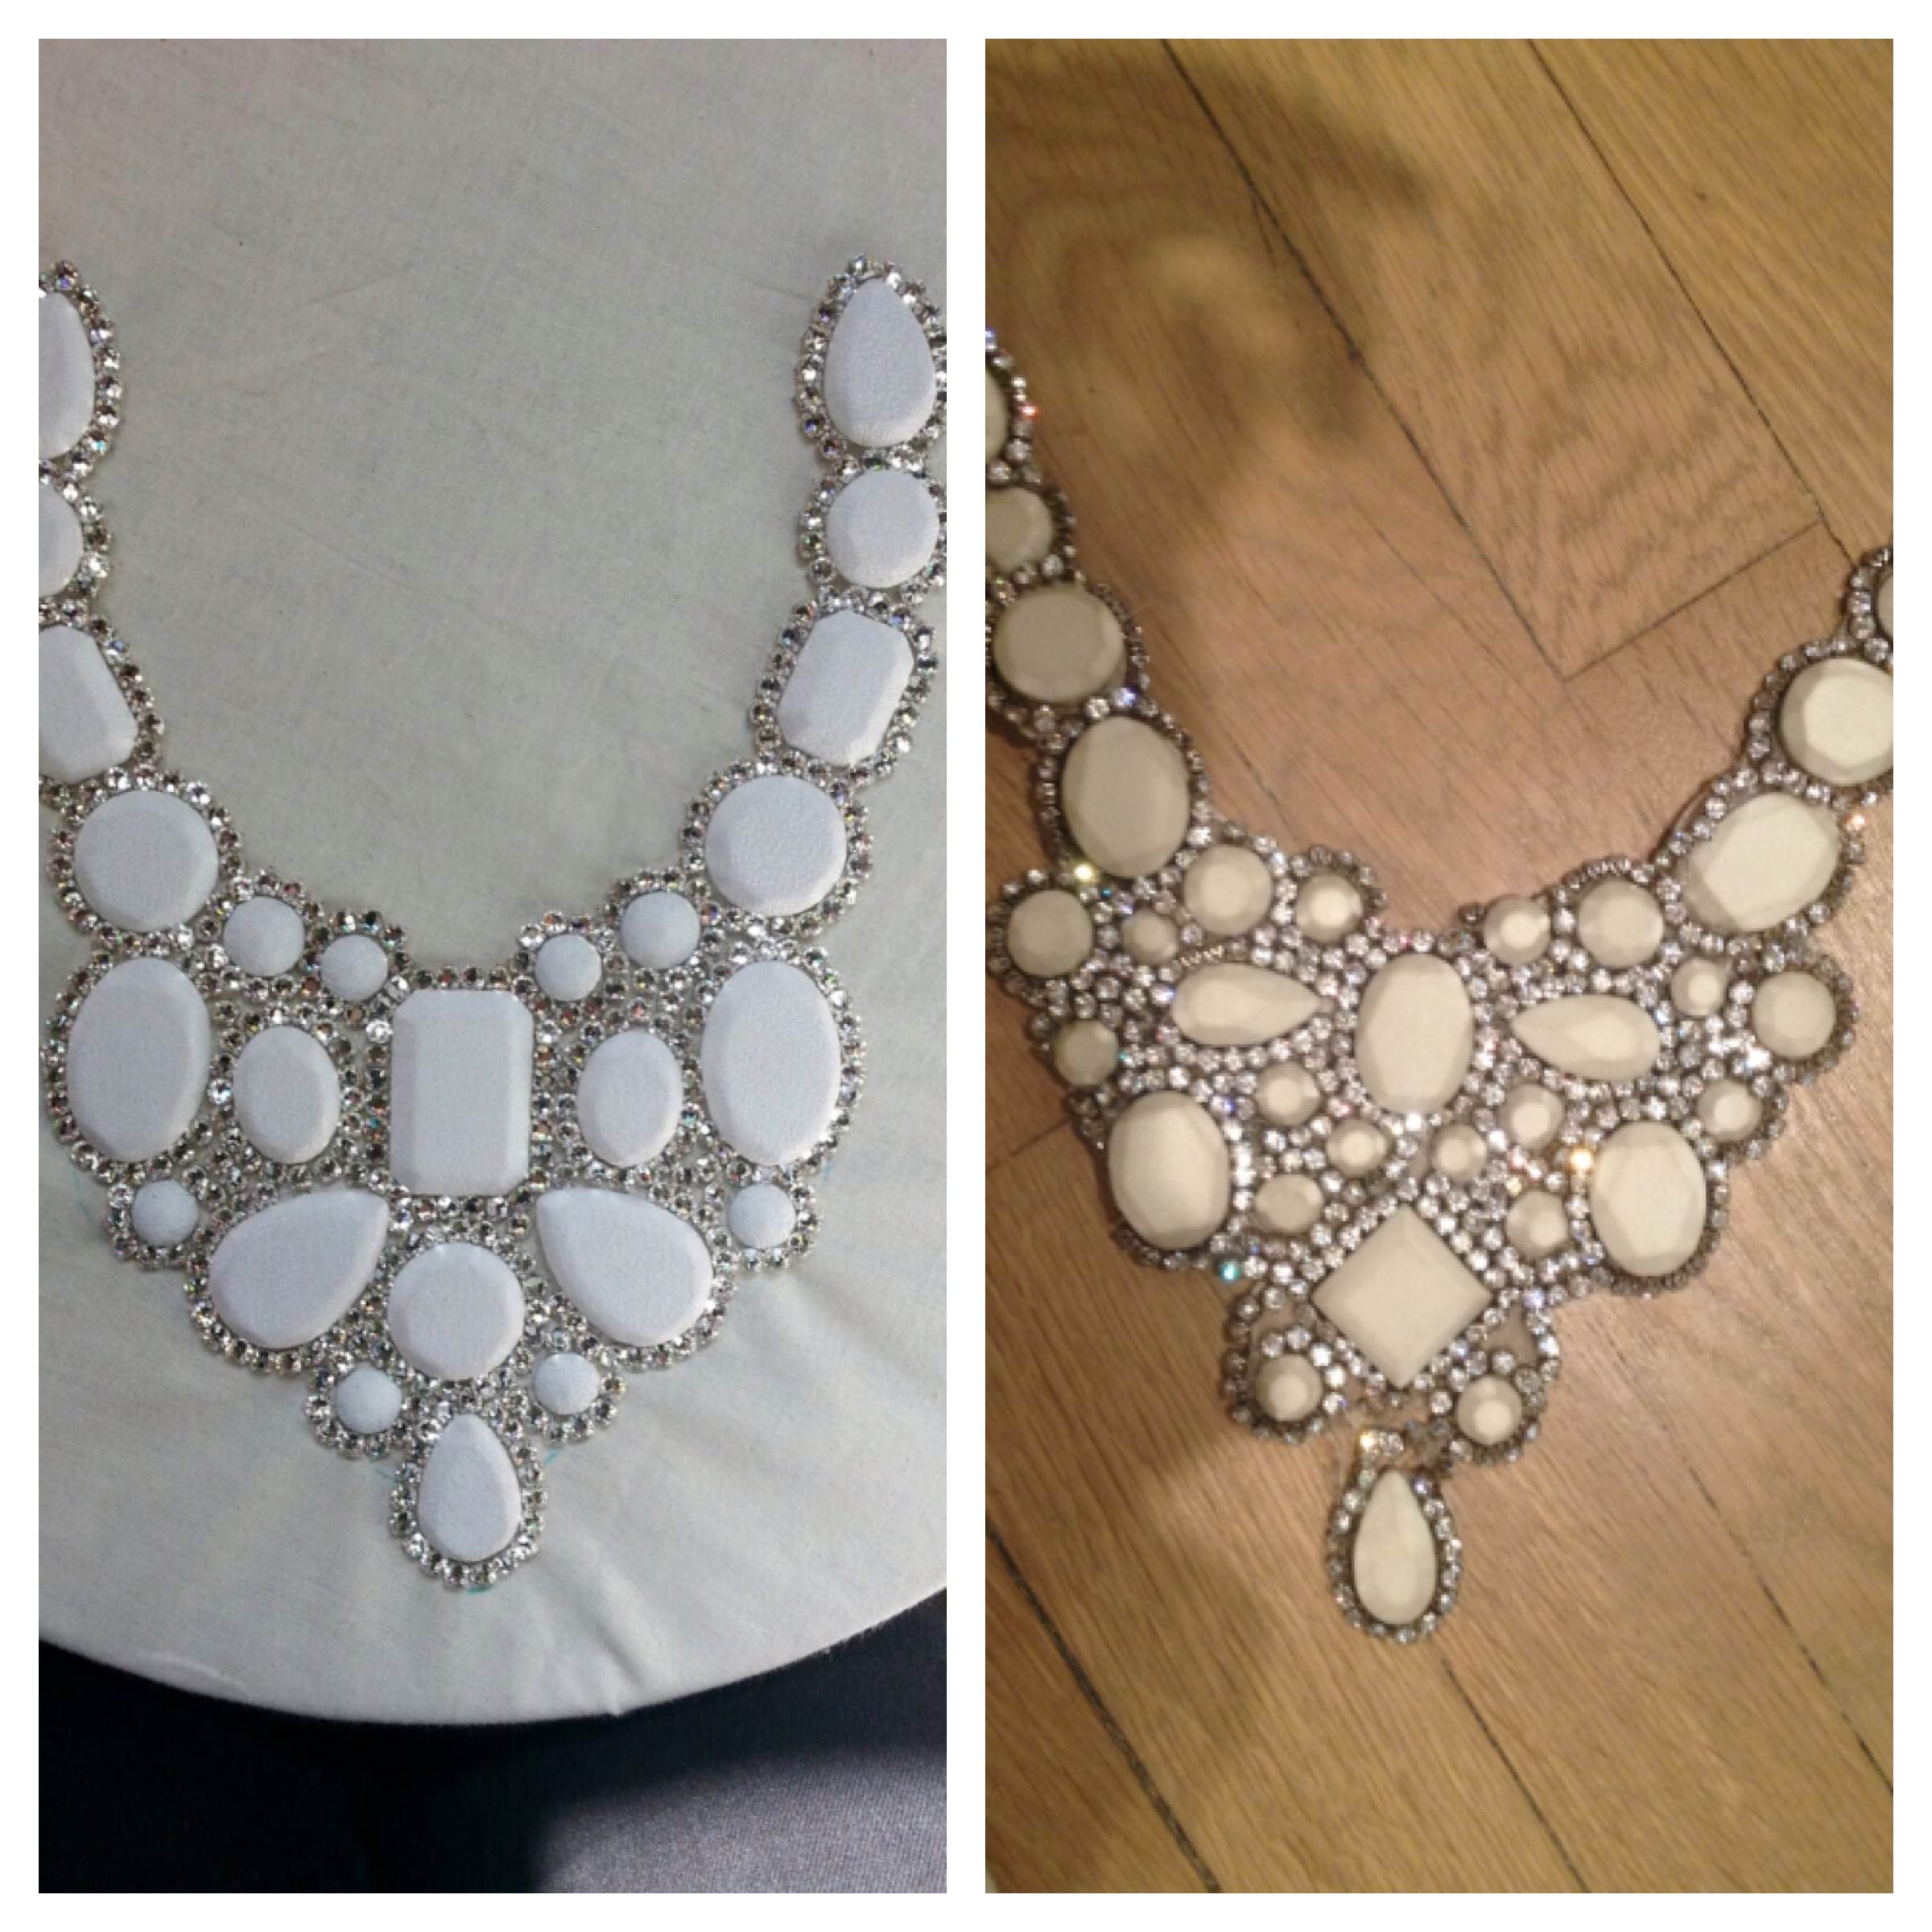
My necklace:
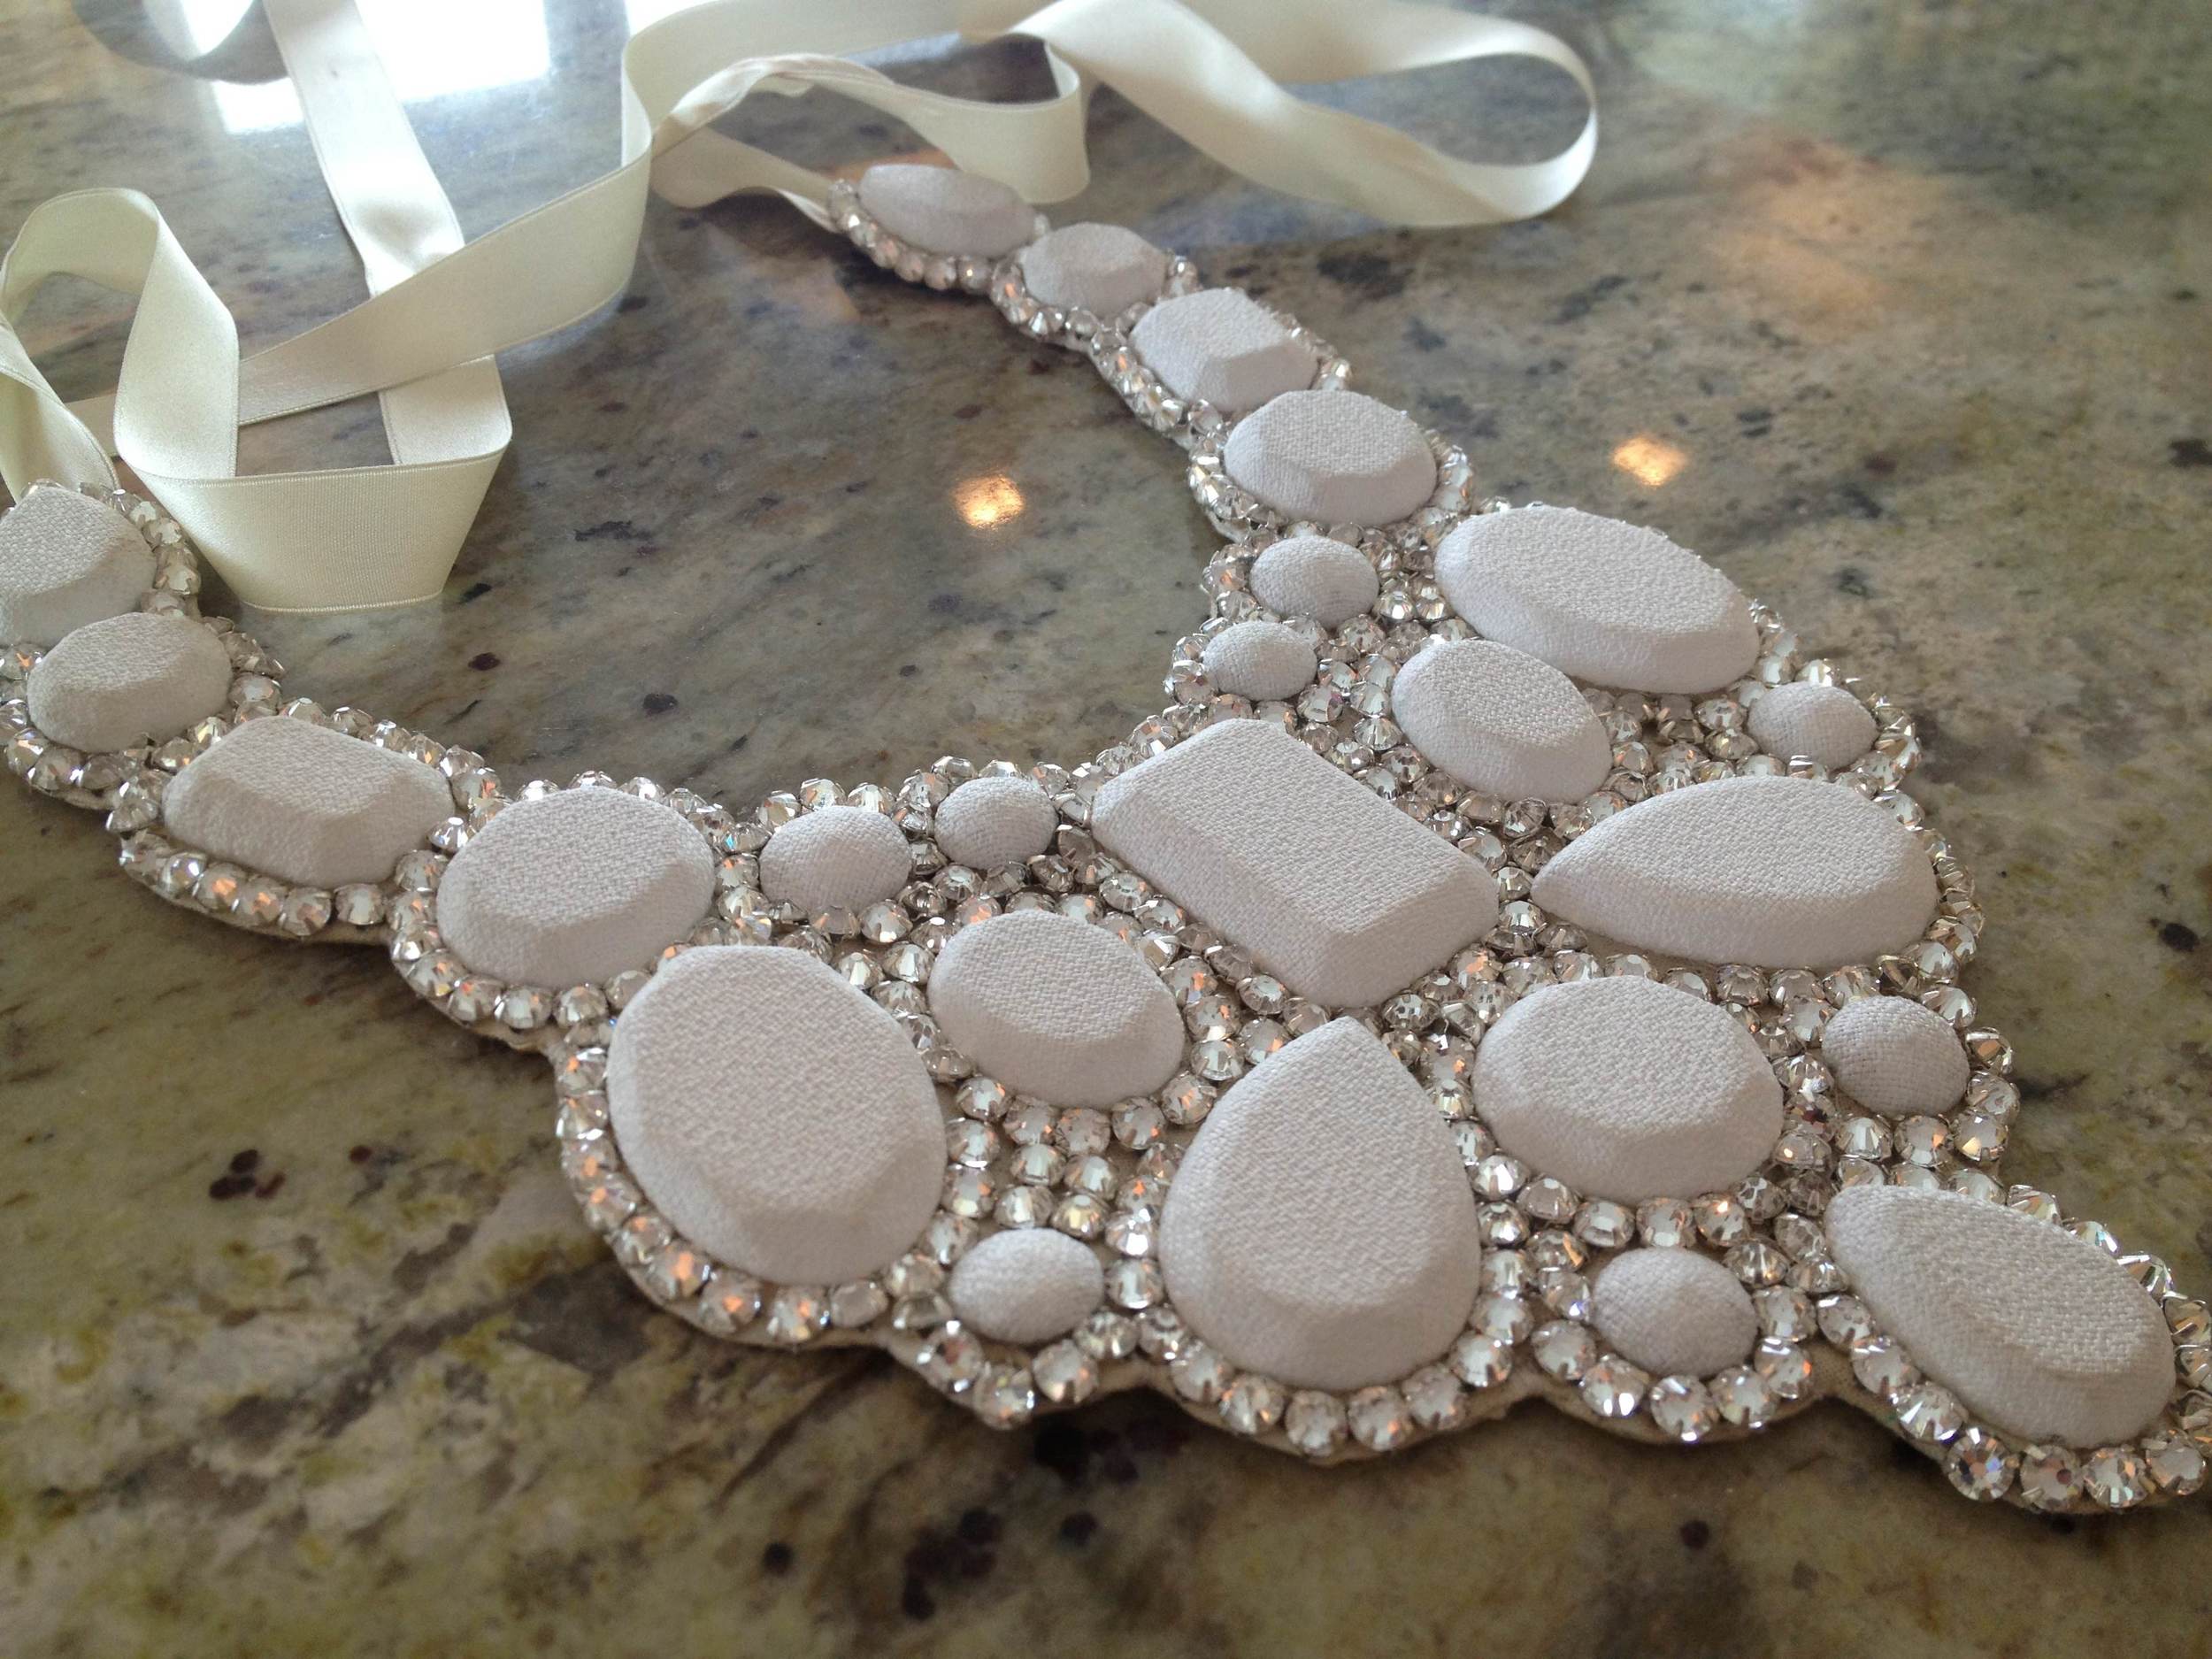
I could seriously write a whole post just on this. This necklace was my favorite piece of the night. It completed the look and took the dress to a new level.

Image
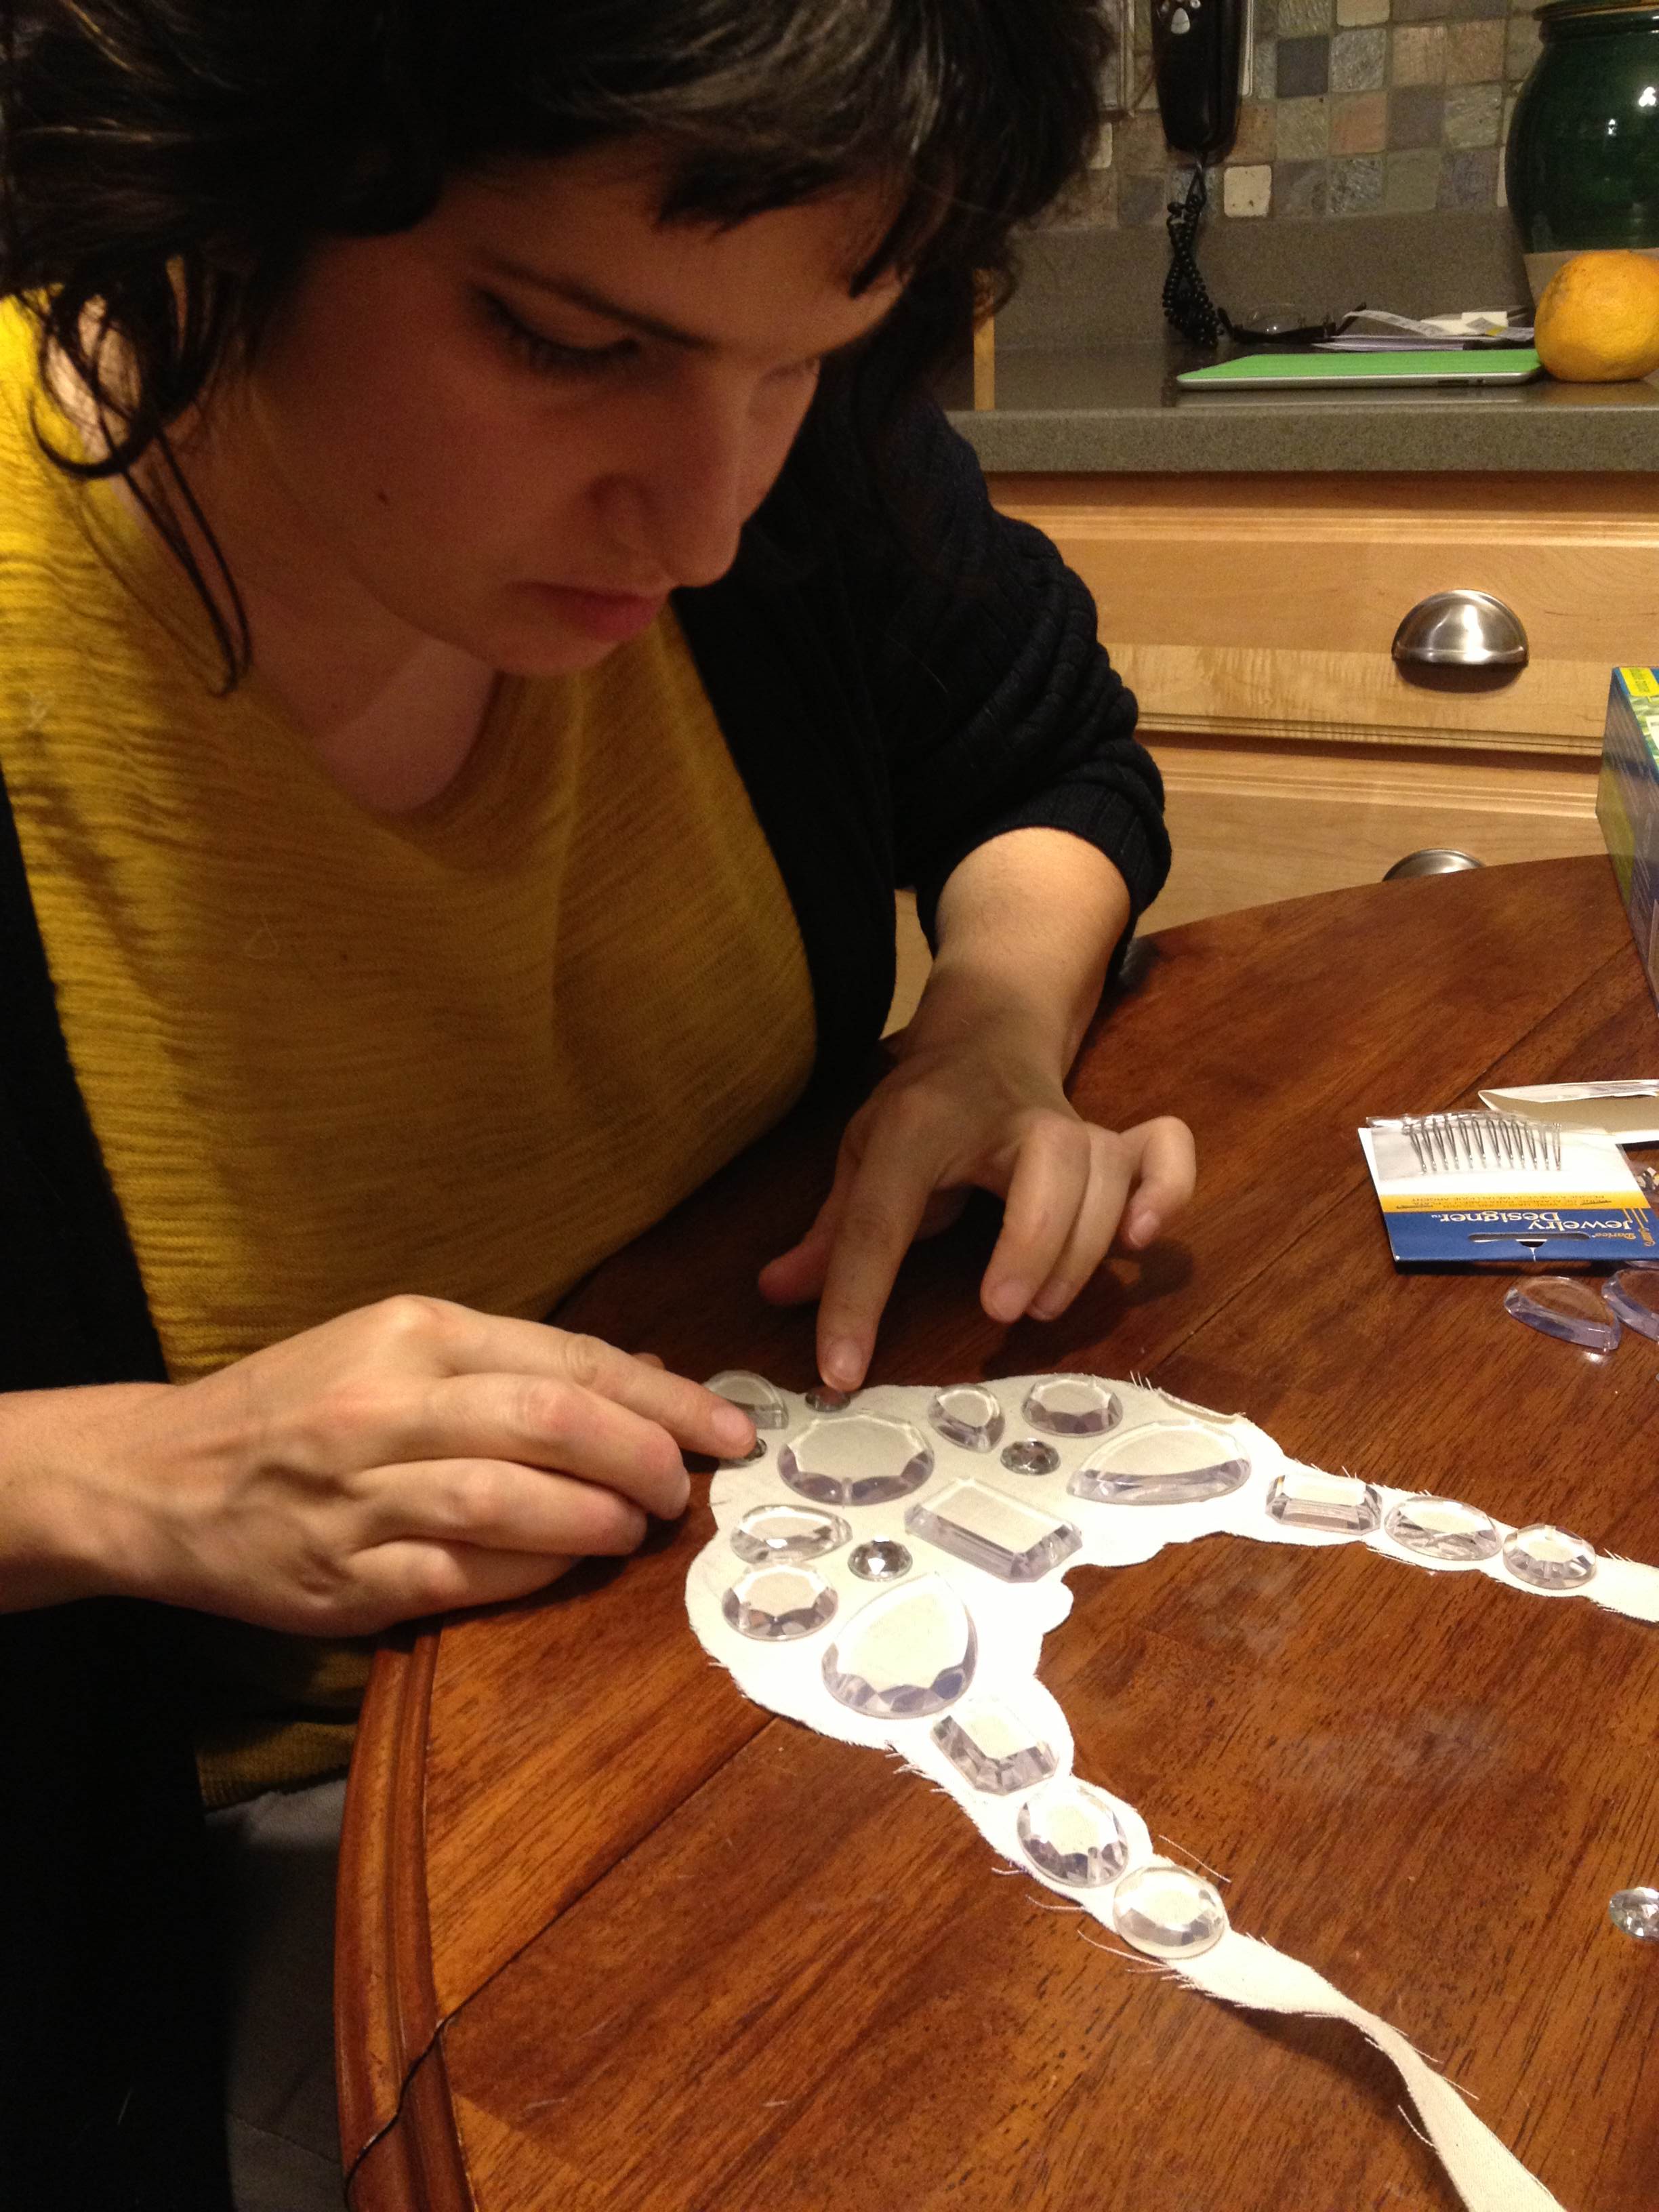
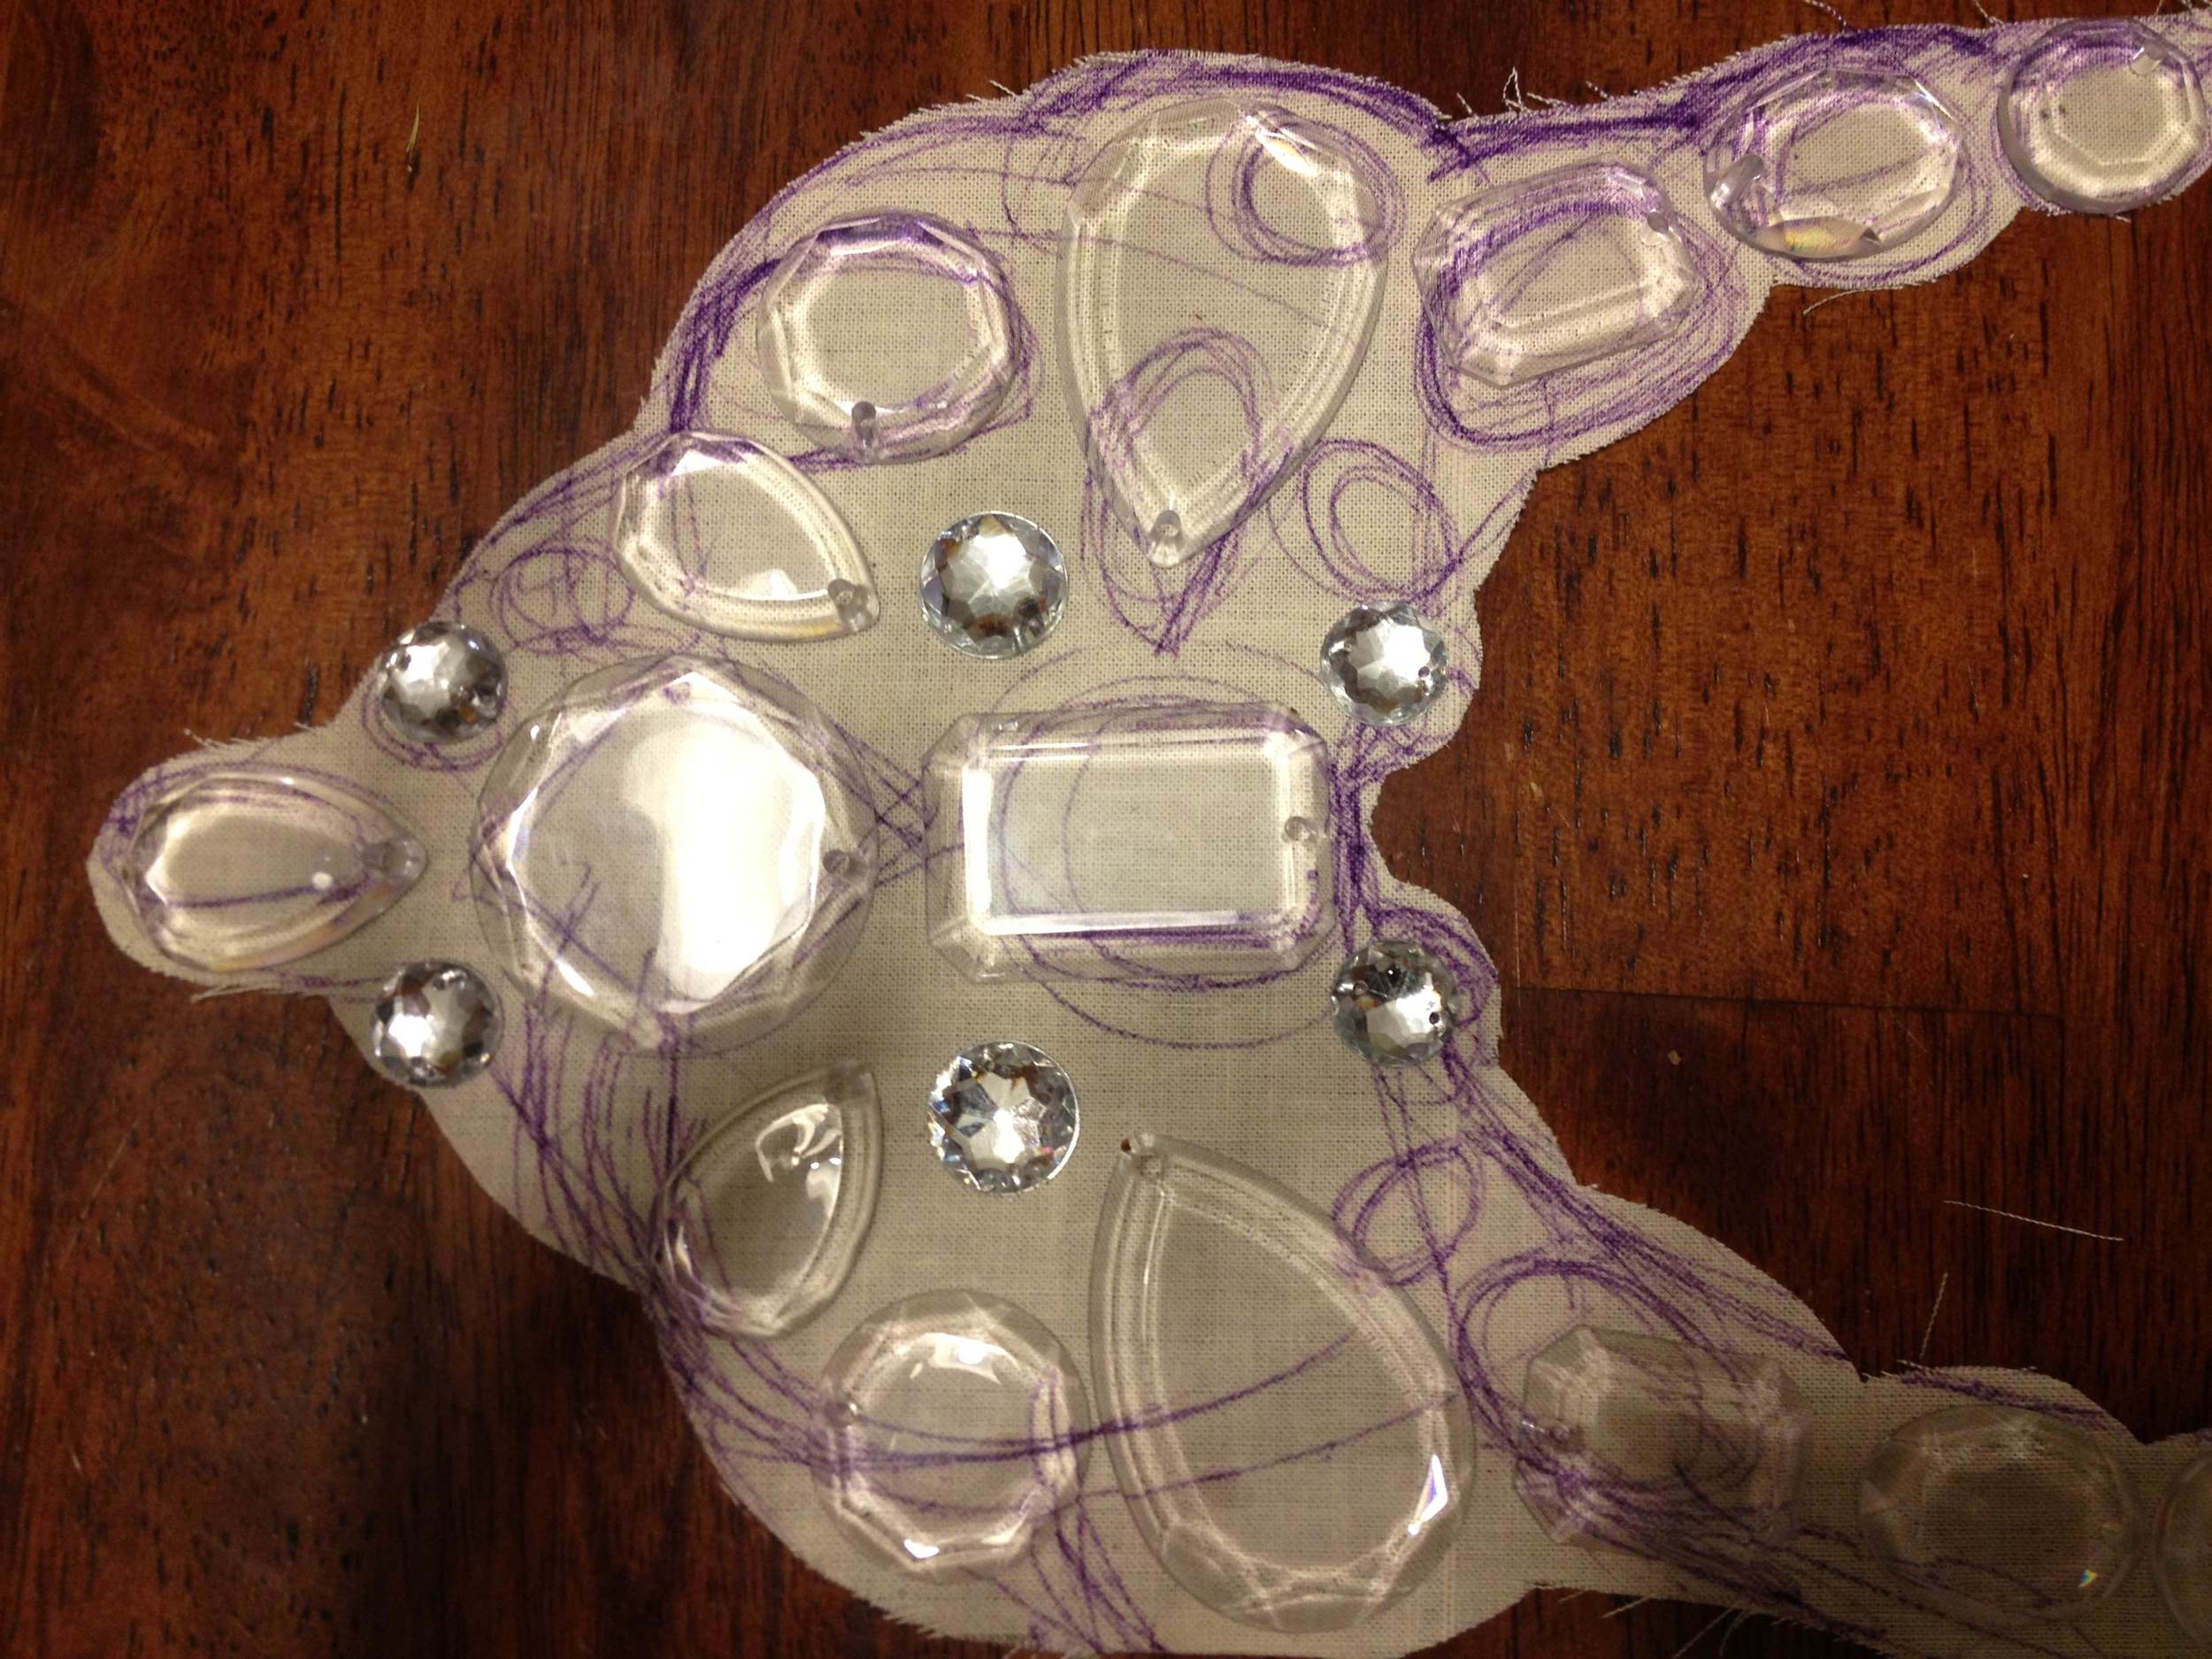
I saw a Reem Acra necklace that I fell in love with but it was SO out of my price range. I showed Erika a picture of the necklace and asked what she thought and said she could make it. Together, we went on hunts to find material, stones, fabric, anything that we could possibly need to recreate this necklace. One of my requirements was to not go "cheap". I wanted to spend a little extra money, get the best materials, and in the end get a good quality product.
Image
Image
Image
Erika's Necklace: Reema Acra:
Image
I also told Erika that I wanted the necklace to sparkle like crazy. She ended up buying some awesome swarovski crystals in NYC, and it was perfect. The necklace was FAR BETTER than the original one I had seen. I was floored when I saw it completed (I saw the final product only a few days before the wedding!) My dreams could not have created something more beautiful and perfect.

Image
This was NOT an easy project. This was ALL hand sewn and crafted by Erika. Every individual crystal was hand sewn. Each stone was covered in material. The whole necklace was backed and it was just perfect, comfortable, sparkly and durable! This was time consuming for Erika, but the joy that it brought me and still brings me today is priceless. I seriously want to wear it every day!
If you want your own Erika said she would make it again for $5,000. Hey if you have the money it is FAR worth it!
The Chuppah What is a Chuppah?
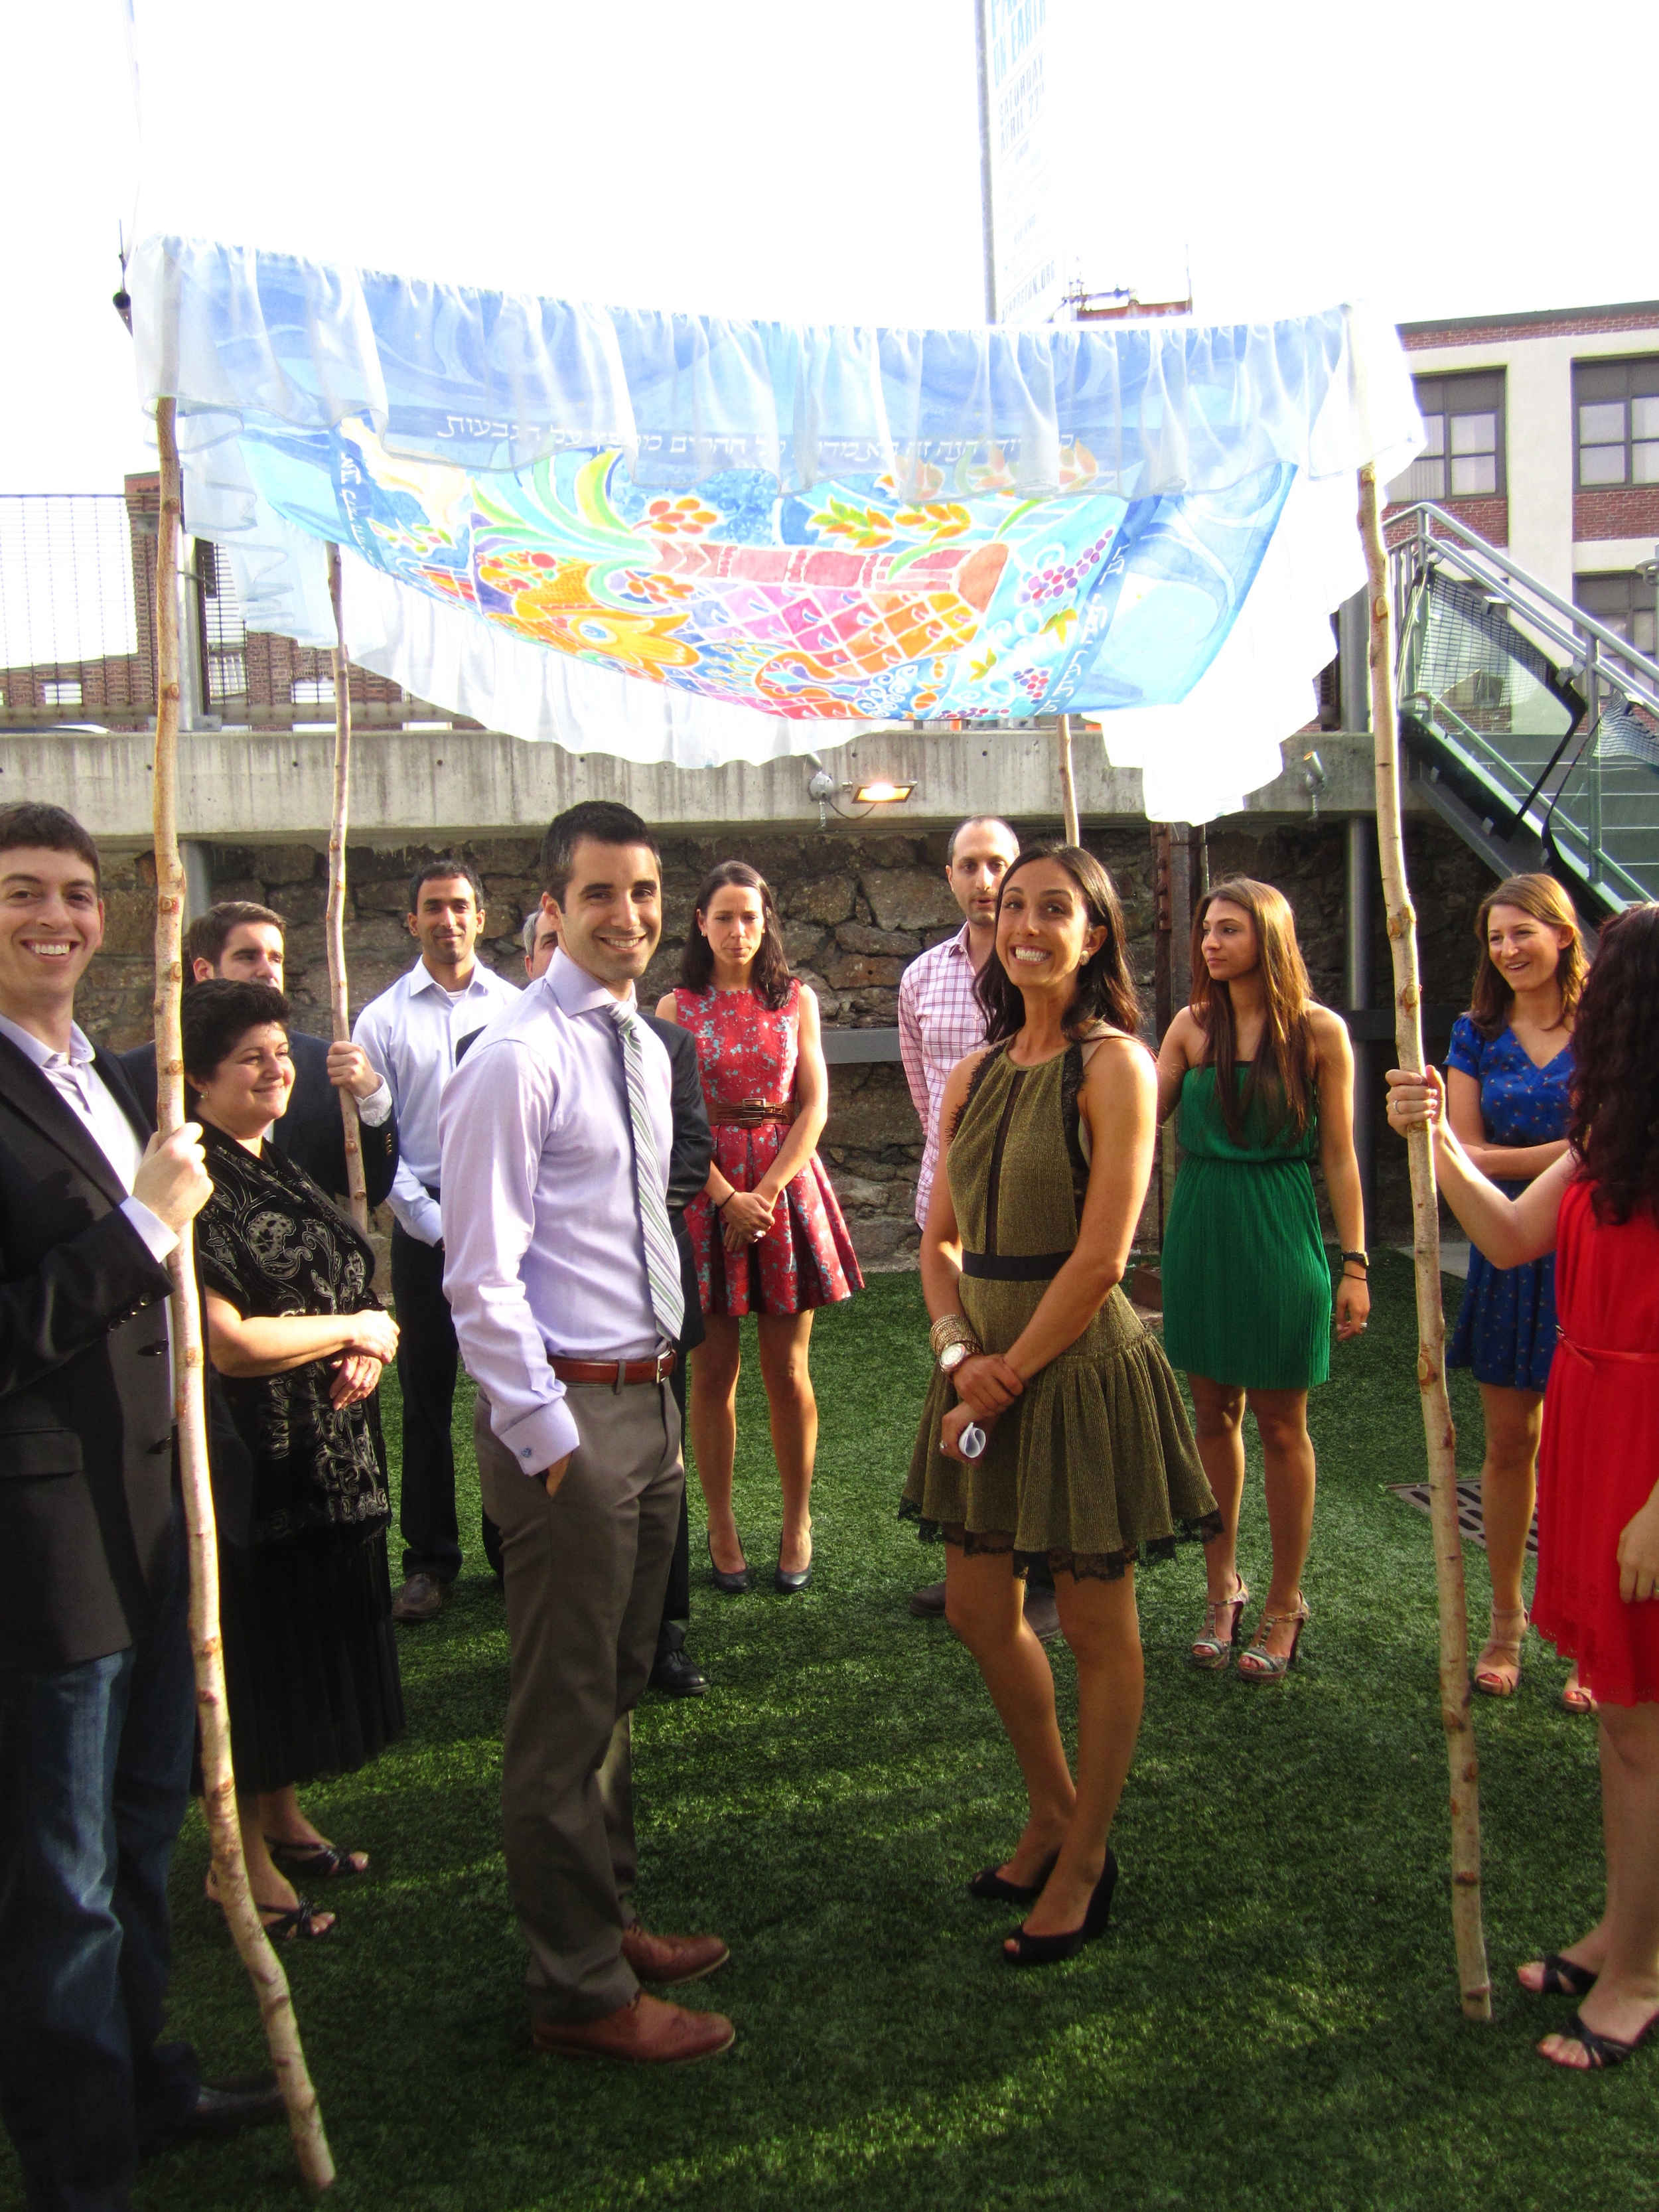
Image
We bought our Chuppah on Etsy. But of course we needed to spice it up. My mother in law added chiffon to the border to make it more "f lowly" and my father in law found some birch wood and made free standing poles that he attached to the chuppah.
Since so much love was put into making this Chuppah, our hope is that our friends and family will continue to use the canopy.
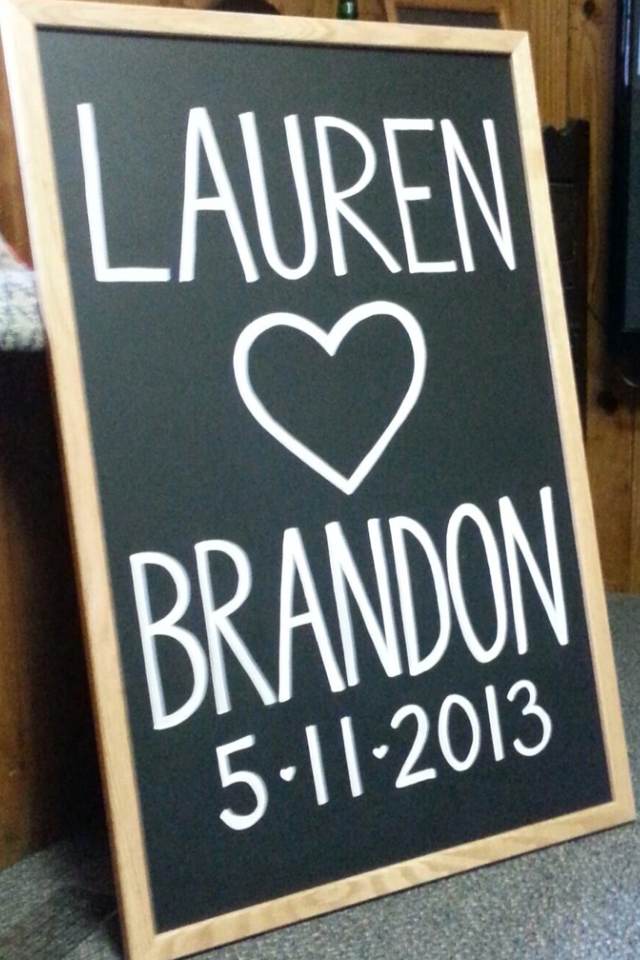
Glitter signs around the room
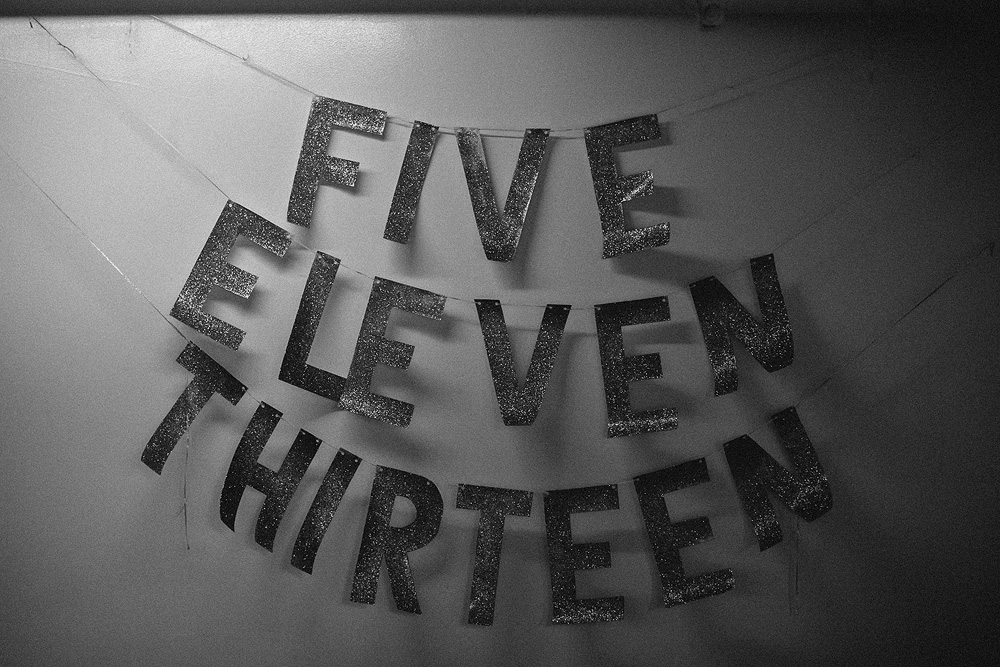
Image
Erika made these awesome glitter signs. We had one that said the date of our wedding.
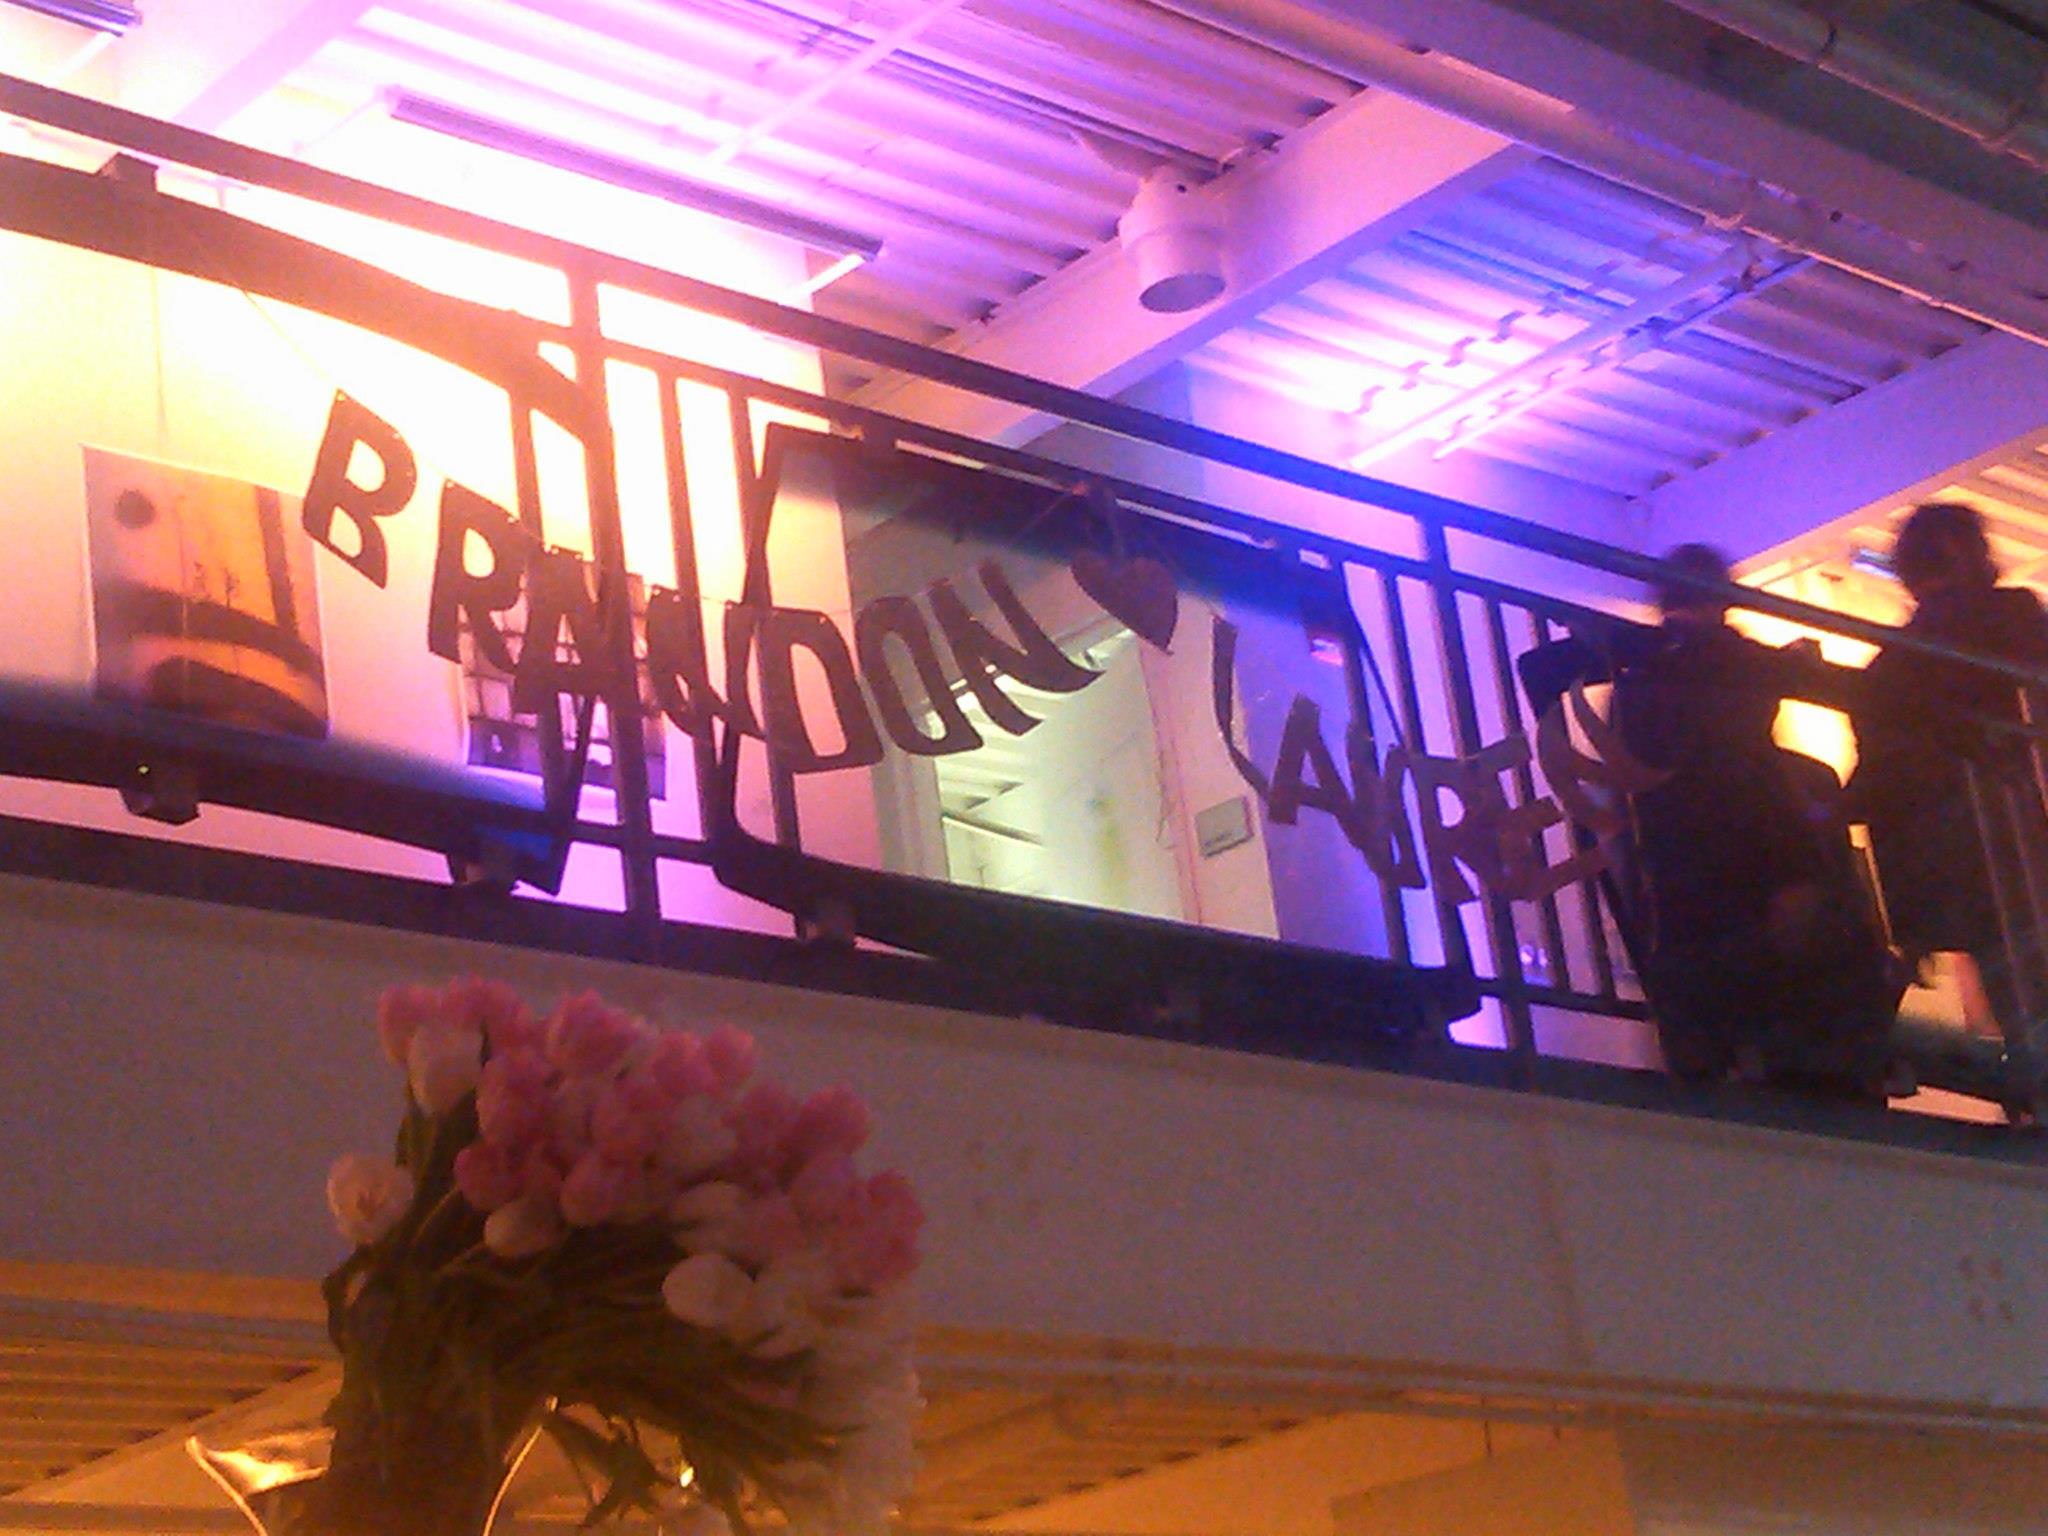
One that said our names connected by a heart. (this photo was clearly taken with a phone)
Image
And our last sign said "sweet love" above the dessert table.
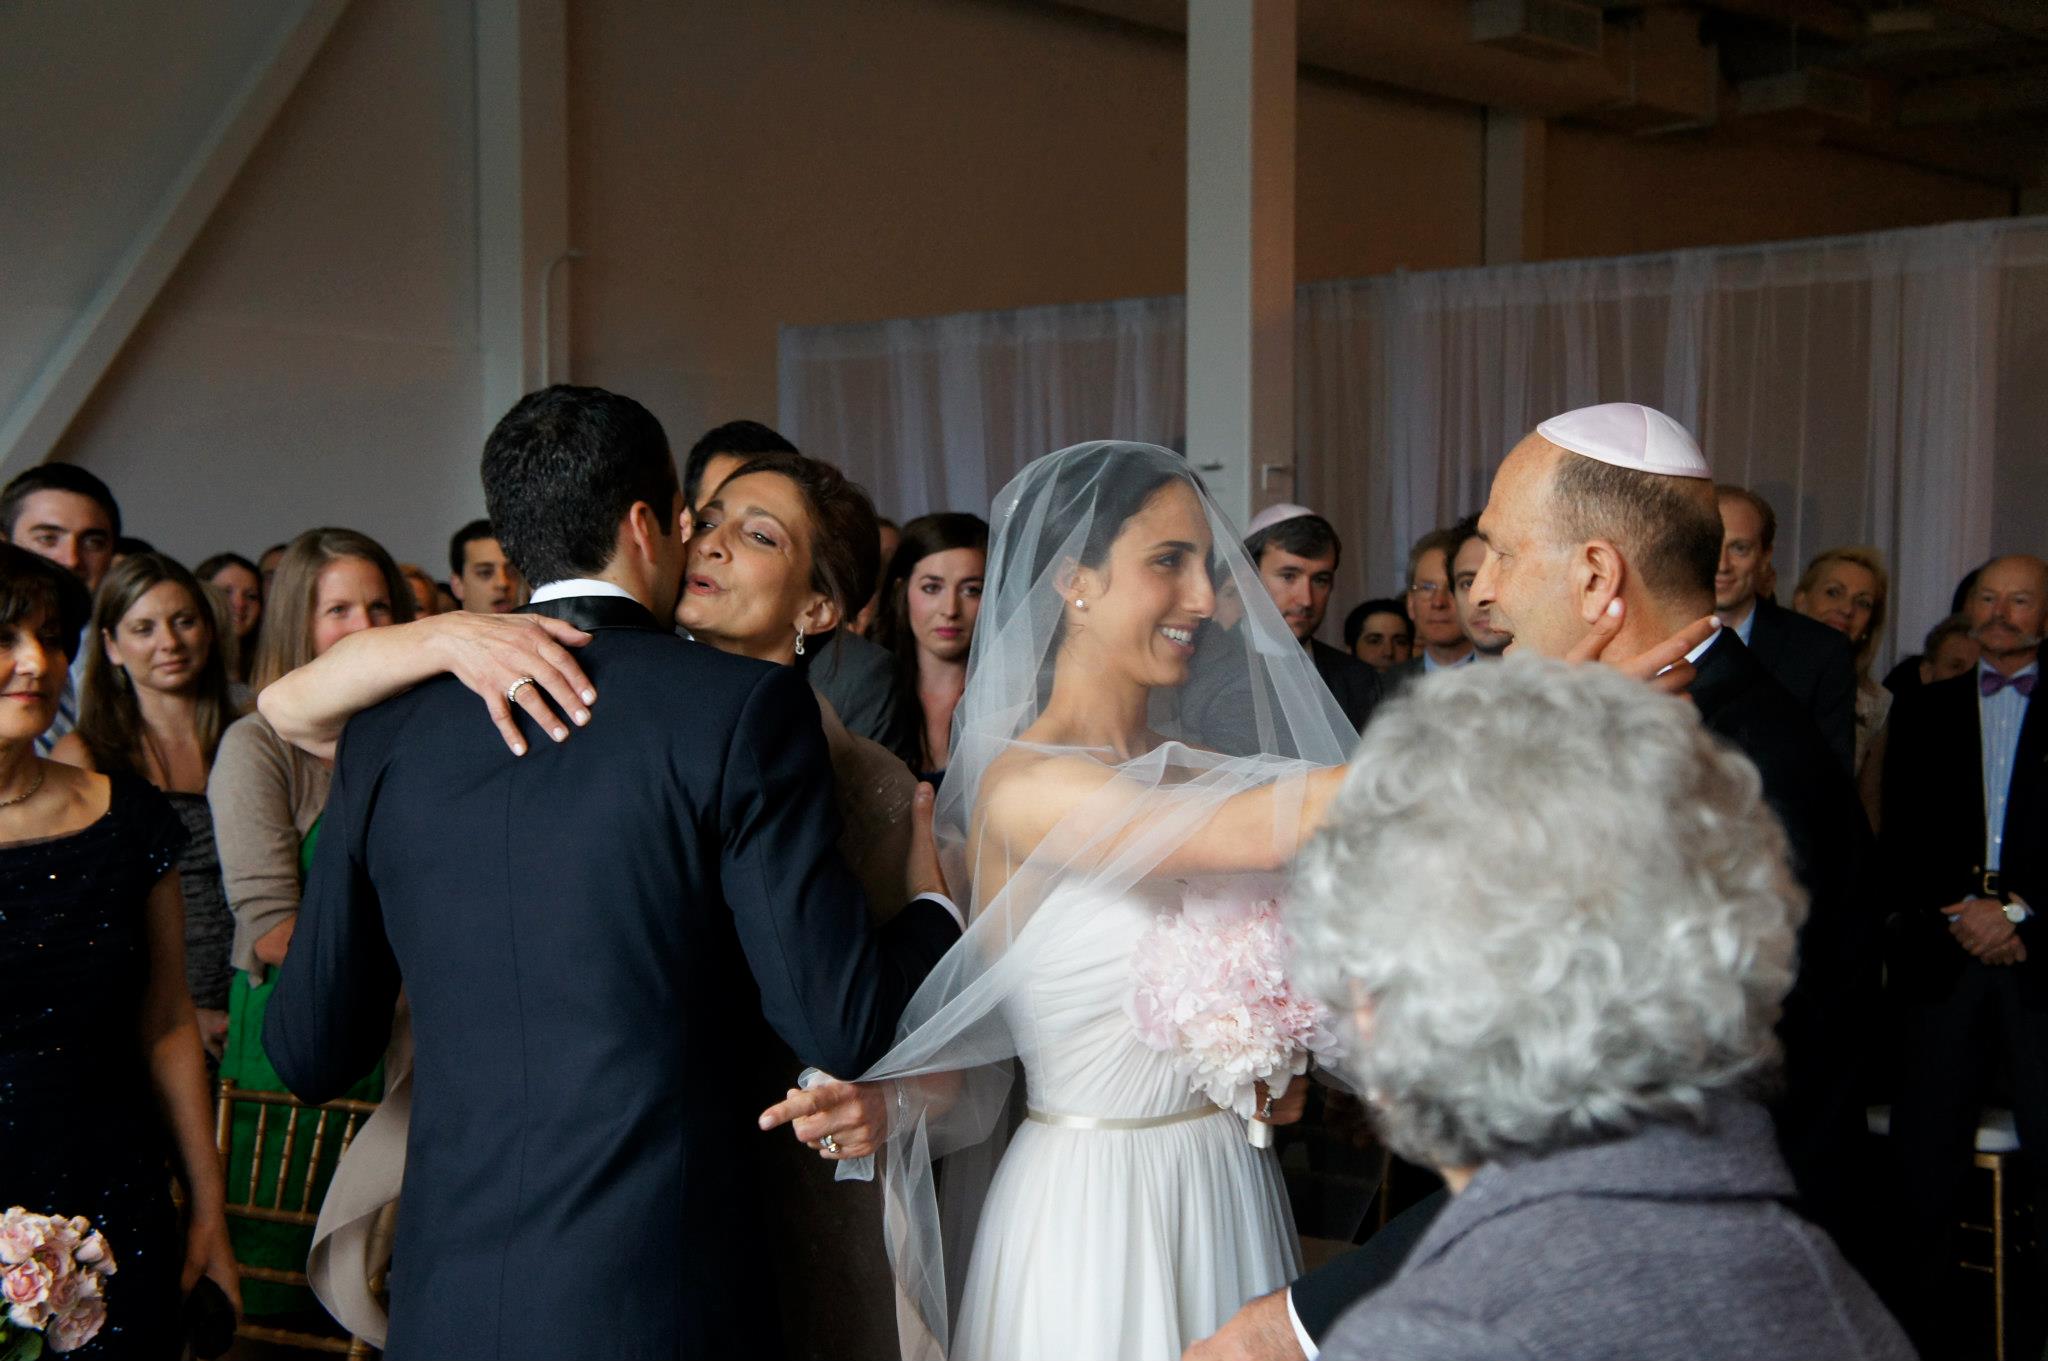
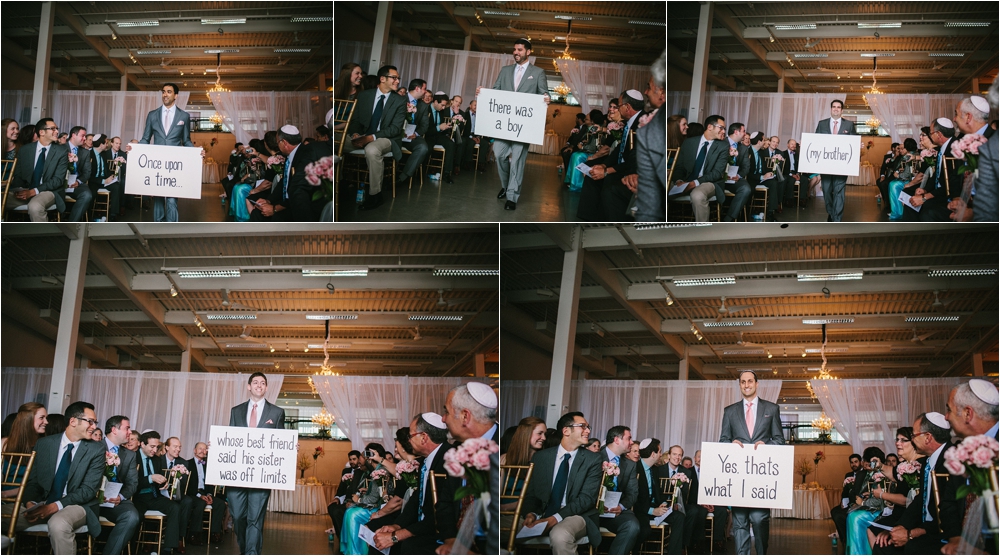
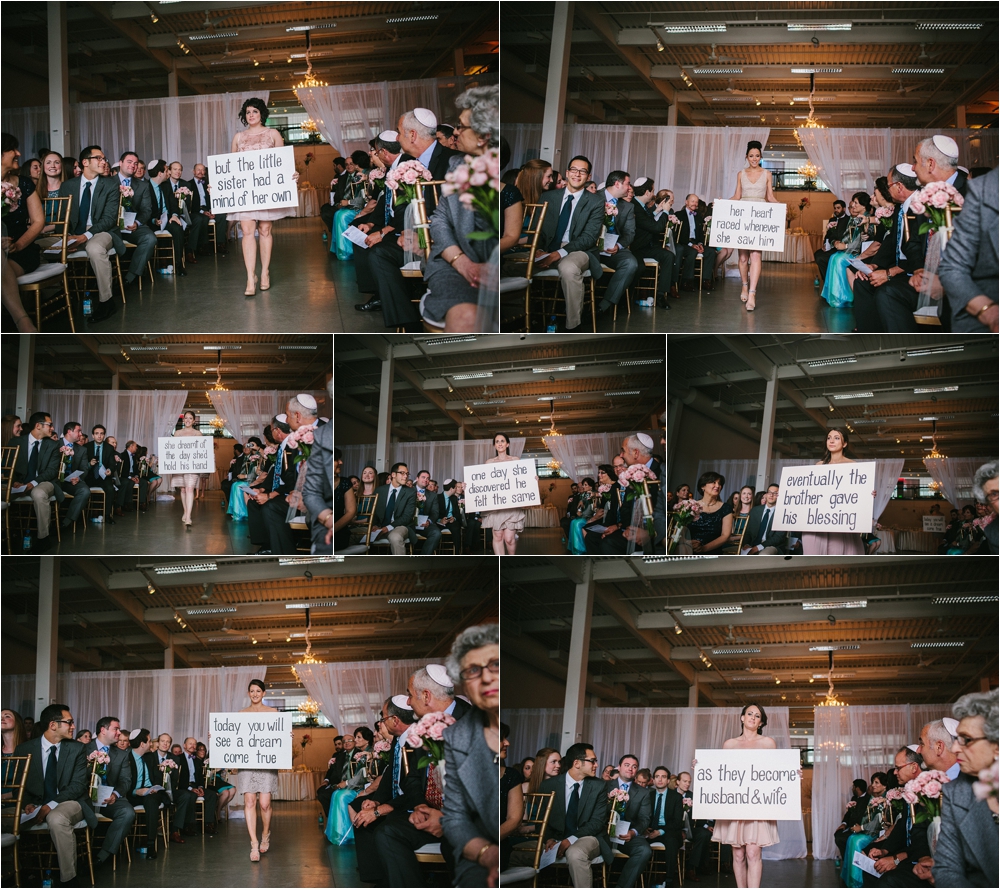
Walking down the aisle:
I wanted to share our love story with all of our friends and family. I also wanted the ceremony to be something special to Brandon and I, and to really represent us. I started brainstorming, and it hit me. Why not tell our love story as our bridesmaids and groomsmen walk down the aisle? I kept this secret for over a year. I wanted it to be special, and have that element of suprise.
Image
(Then enters groom and parents!) *Click to enlarge photos
Image
(Then enters bride and parents!)
Each groomsman and bridesmaid held a sign as they walked down the aisle. It was special and different, and I think everyone really appreciated the unique touch.
Chalk Boards
Drink menu sign:

Image
Erika is meticulous and a perfectionist. So when it came to the chalkboard sign of our alcohol list and welcome sign I knew she would make it awesome! I bought the white chalk board markers and the chalk boards off amazon. Chalkboards add a cute, fun and creative feel to any wedding. I love the look they give!
Welcome sign:
Image
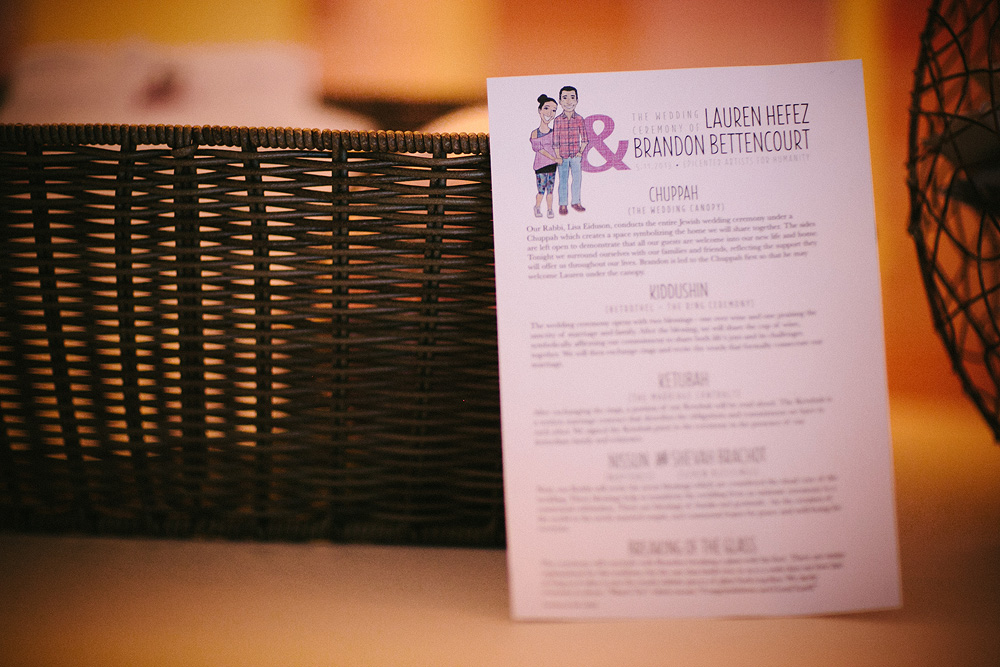
Caricature on programs
Image
Programs are fun to read but sometimes BLAH to look at. I LOVE creative programs. I had a family friend draw a picture of Brandon and I. I then gave the lady that created our invitations some ideas for programs that I liked. She added the personalized caricature and there you have it: a program that people want to read.
Table numbers & holders
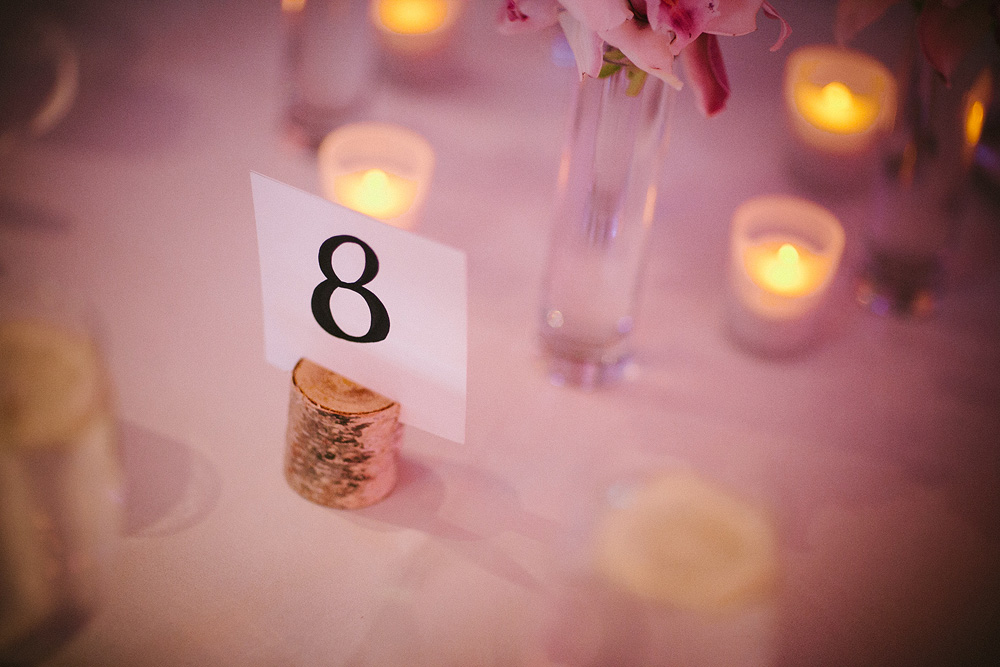
Image
I had a hard time with this one. I knew I had to have table numbers so that people would know where to sit, but I did not want the traditional metal rods, or picture frames. I was even thinking crazy things like hiring ballerina dancers to hold the numbers next to each table. But that quickly proved to be a terrible idea. Four days before the wedding the idea came to me and my father in law was able to deliver! He had an extra birch wood from the Chuppah project. So he cut the birch wood, and made a little slit on the top to fit the table numbers. Erika hand wrote every number. How perfect!
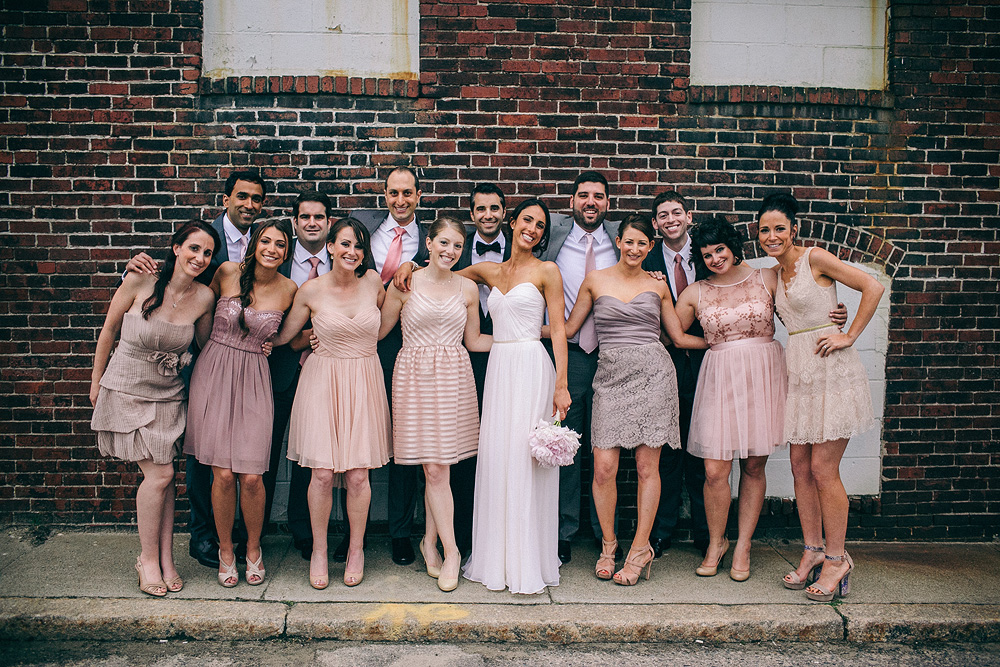
Bridesmaids dresses
I love the look of different dreses but all in the same color pallet and feel. So this is what happened when I let my bridesmaids pick their own dresses:
Image
I think they look quite spectacular. Nice job ladies!
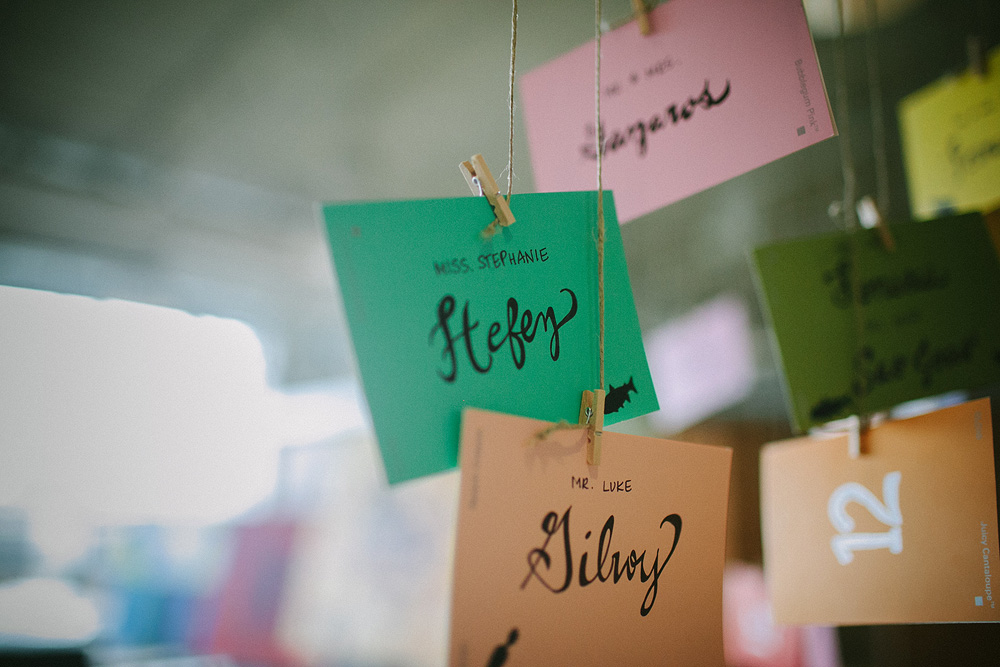
Table name cards

Image
This one was one of my favorites! I had a vision and Erika and my florist were able to make it come alive! The room for our cocktail hour was not your typical function room. It has giant windows, the walls are covered in beautiful bright paintings and the floor splattered in paint. The ceilings are high and the room just has this WOW feel. I wanted to use paint chips as a common theme throughout the wedding. My wedding took place in an artists studio, so it only seamed appropriate.
Image
Erika wrote every guests name in this amazing font (she also did all the addressing for the wedding invitation envelopes in the same font). My mother in law, Brandon and I did the numbers on the back, not as amazing as the front, but it was OK. My florist made a mobile to hang all the paint chips from, and then he attached it to the ceiling so that every place card hung individually. This was in the center of the cocktail hour room. It was so awesome to see my vision come alive, and I really loved the way it turned out. All in all- be creative and have fun with this kind of stuff. There is NO right or wrong!
Image
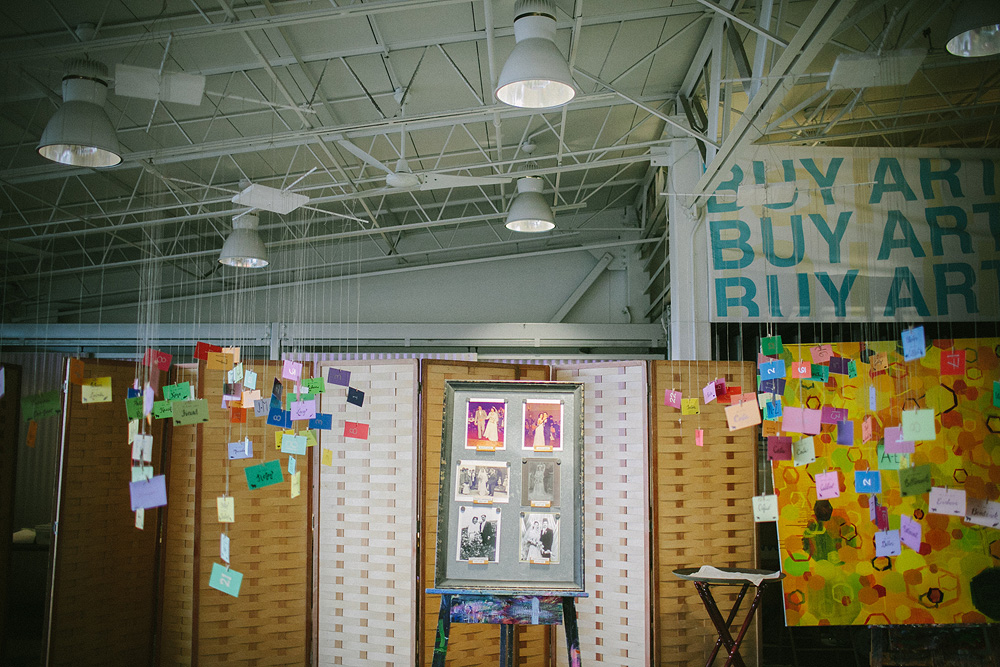
Paint chip wall
The room where we had our reception had all white walls with high ceilings, and a lot of space. Erika had the idea of using paintchips to create a really cool effect. Her thought process was that it is FREE and will only take a lot of time, but the final product will be worth it!
I told her the color pallet I wanted and she took control. My bridesmaids, mom, mother in law and I had many days of stapling paintchips together. Erika was a master at snagging them from Home Depot! My mom and I have to work on our skills. Thank you HOME DEPOT! We used hundreds of paintchips all in the blush, pink, and light mauve color pallets.
We then hole punched the top of every strip, and Erika used a wire and hung it along a pipe that was already attached to the wall. This paint chip wall gave the room a really cool look. I loved it!
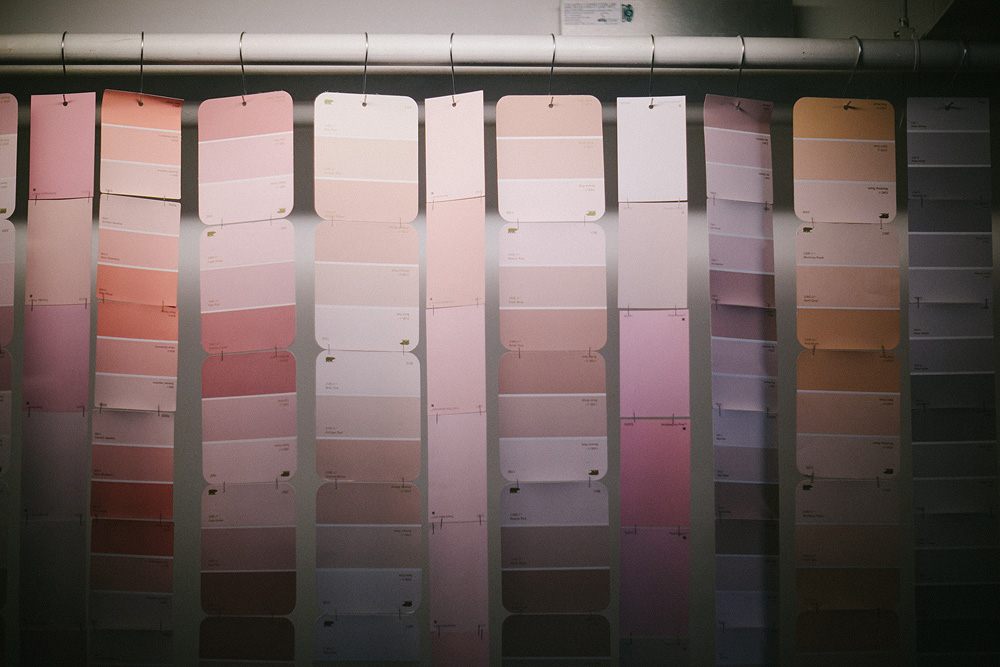
Image
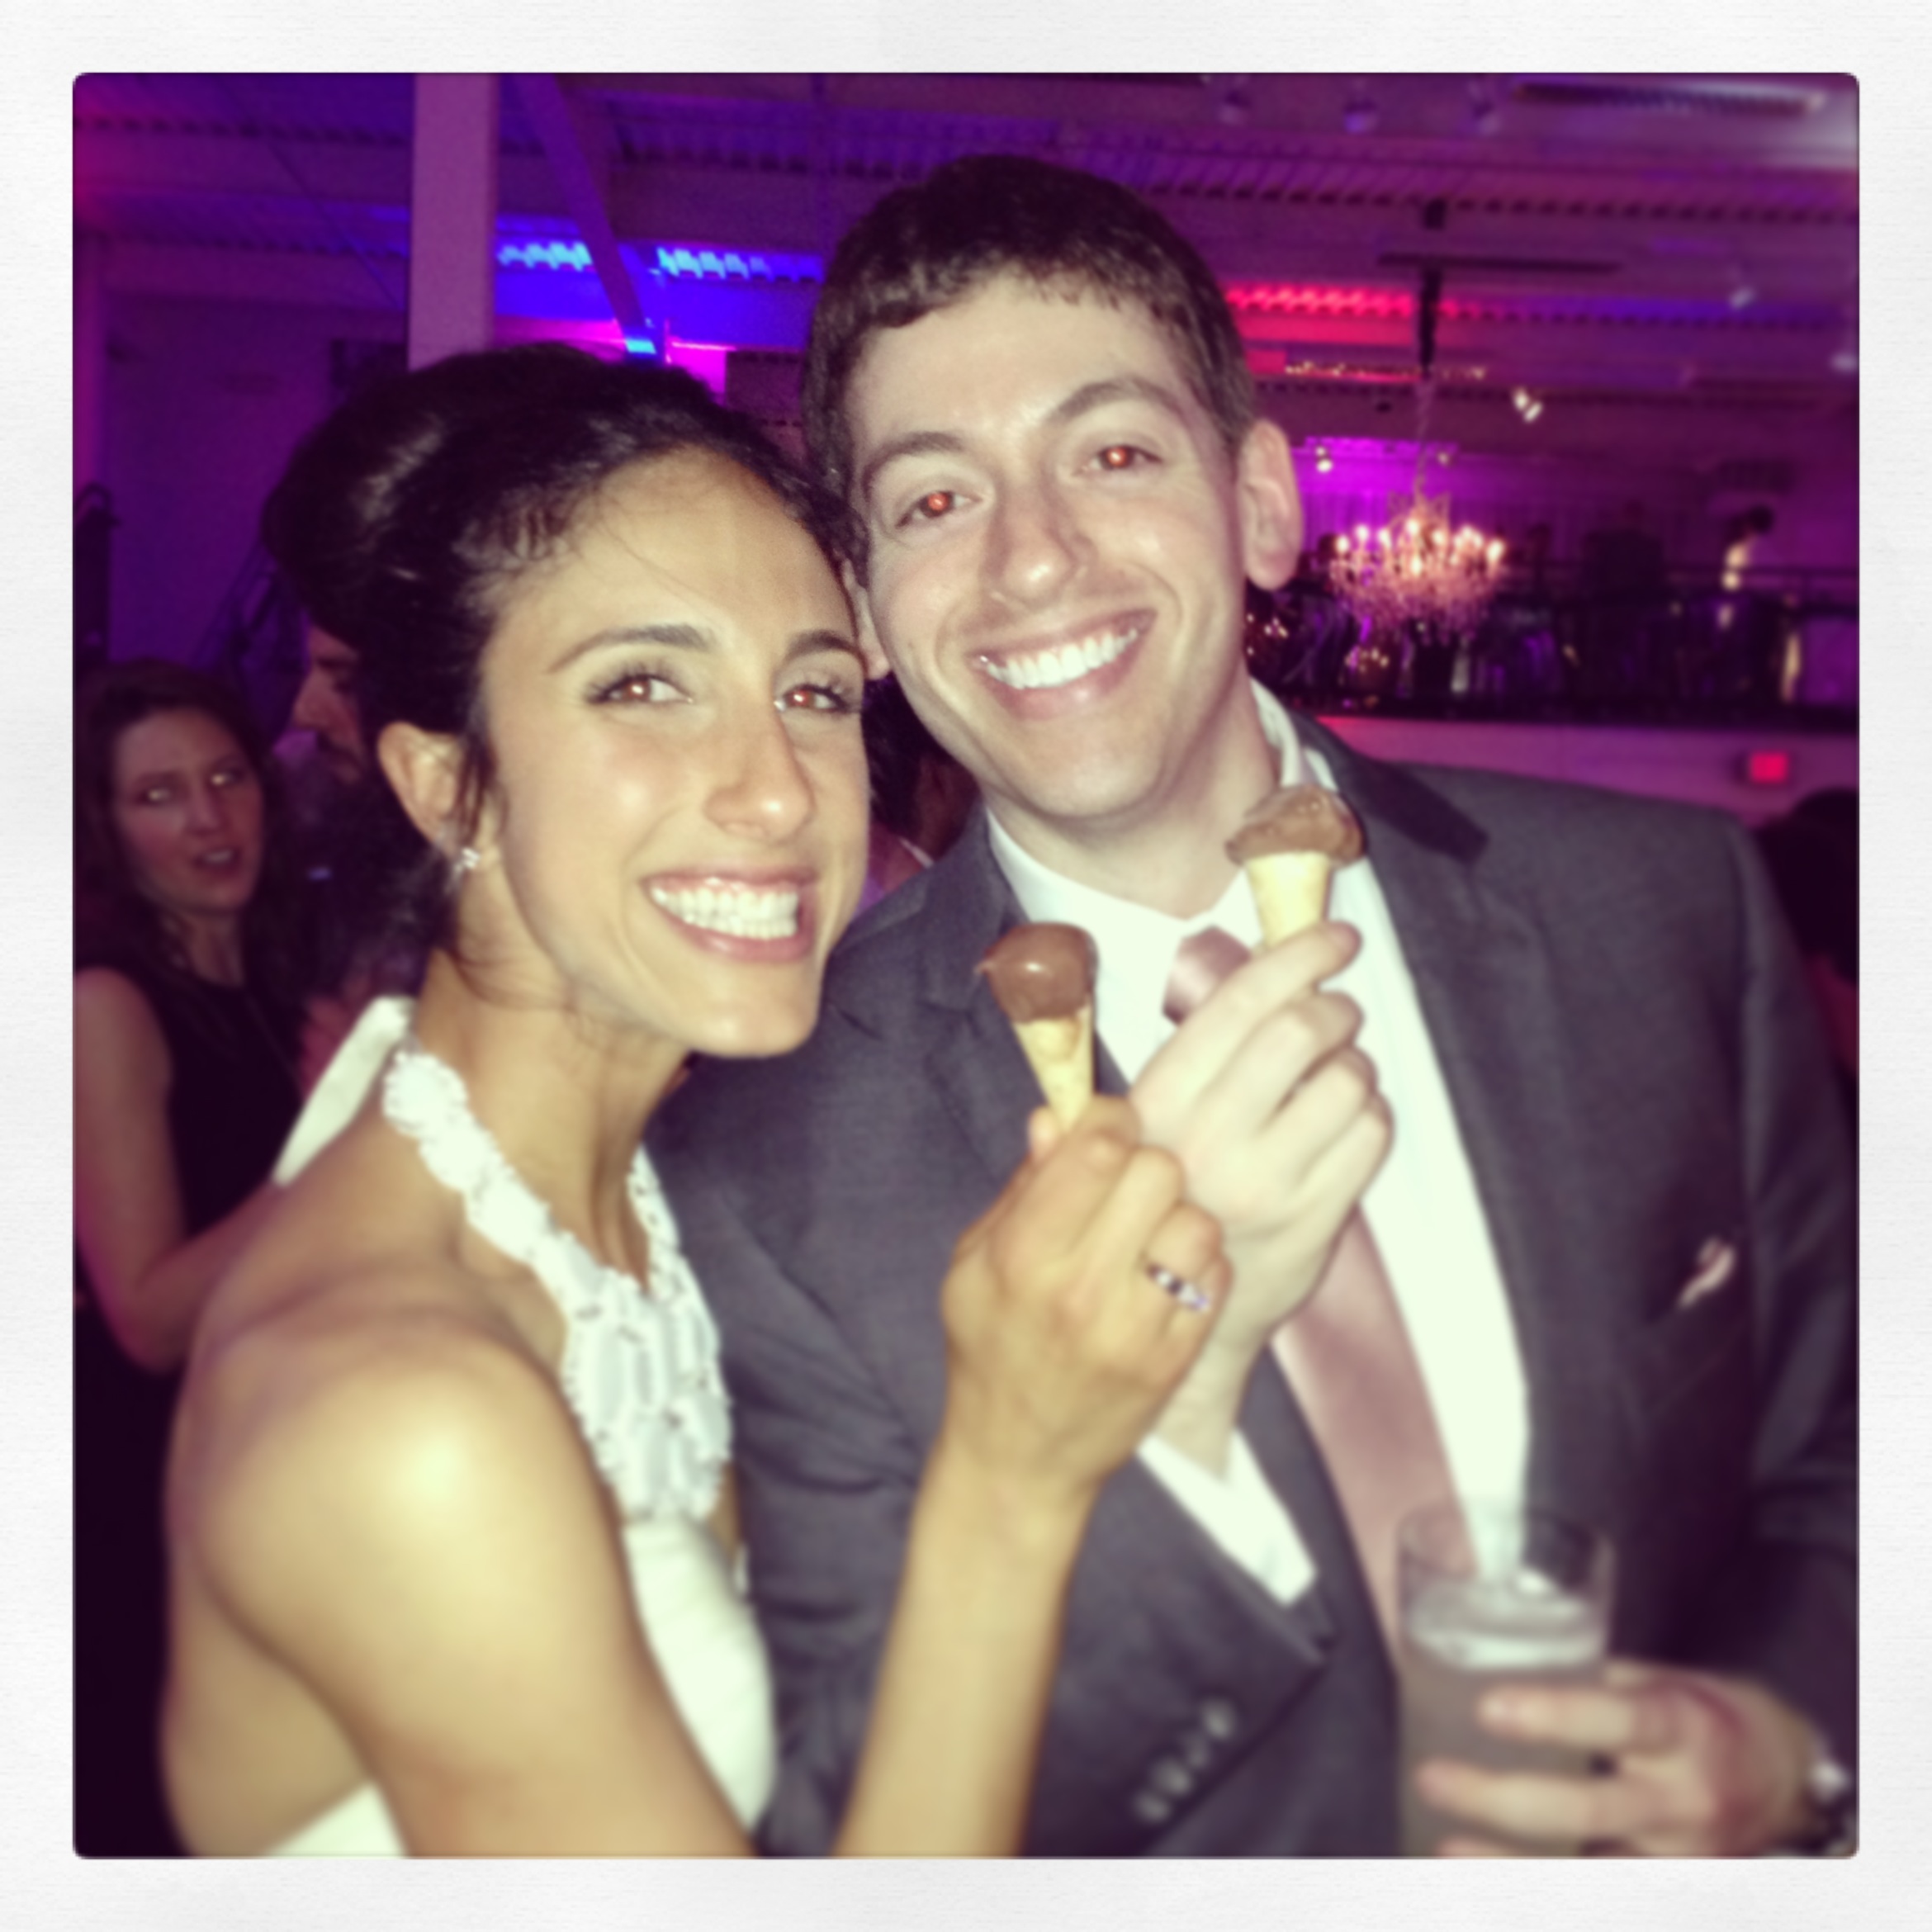
Mini ice cream cones
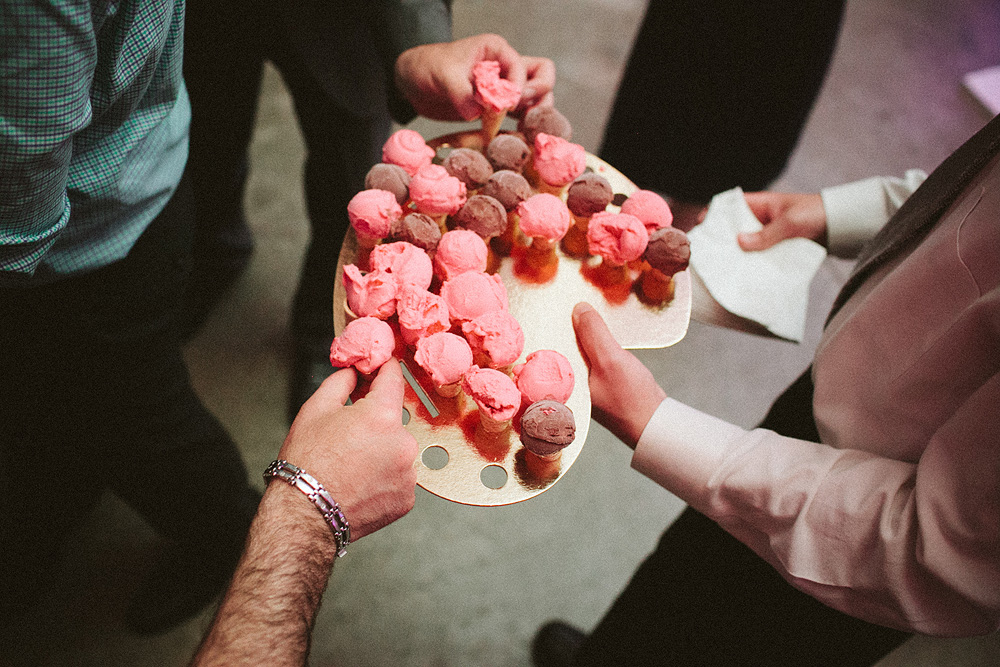
Image
This little late night treat needed a lot of hands to happen!

Image
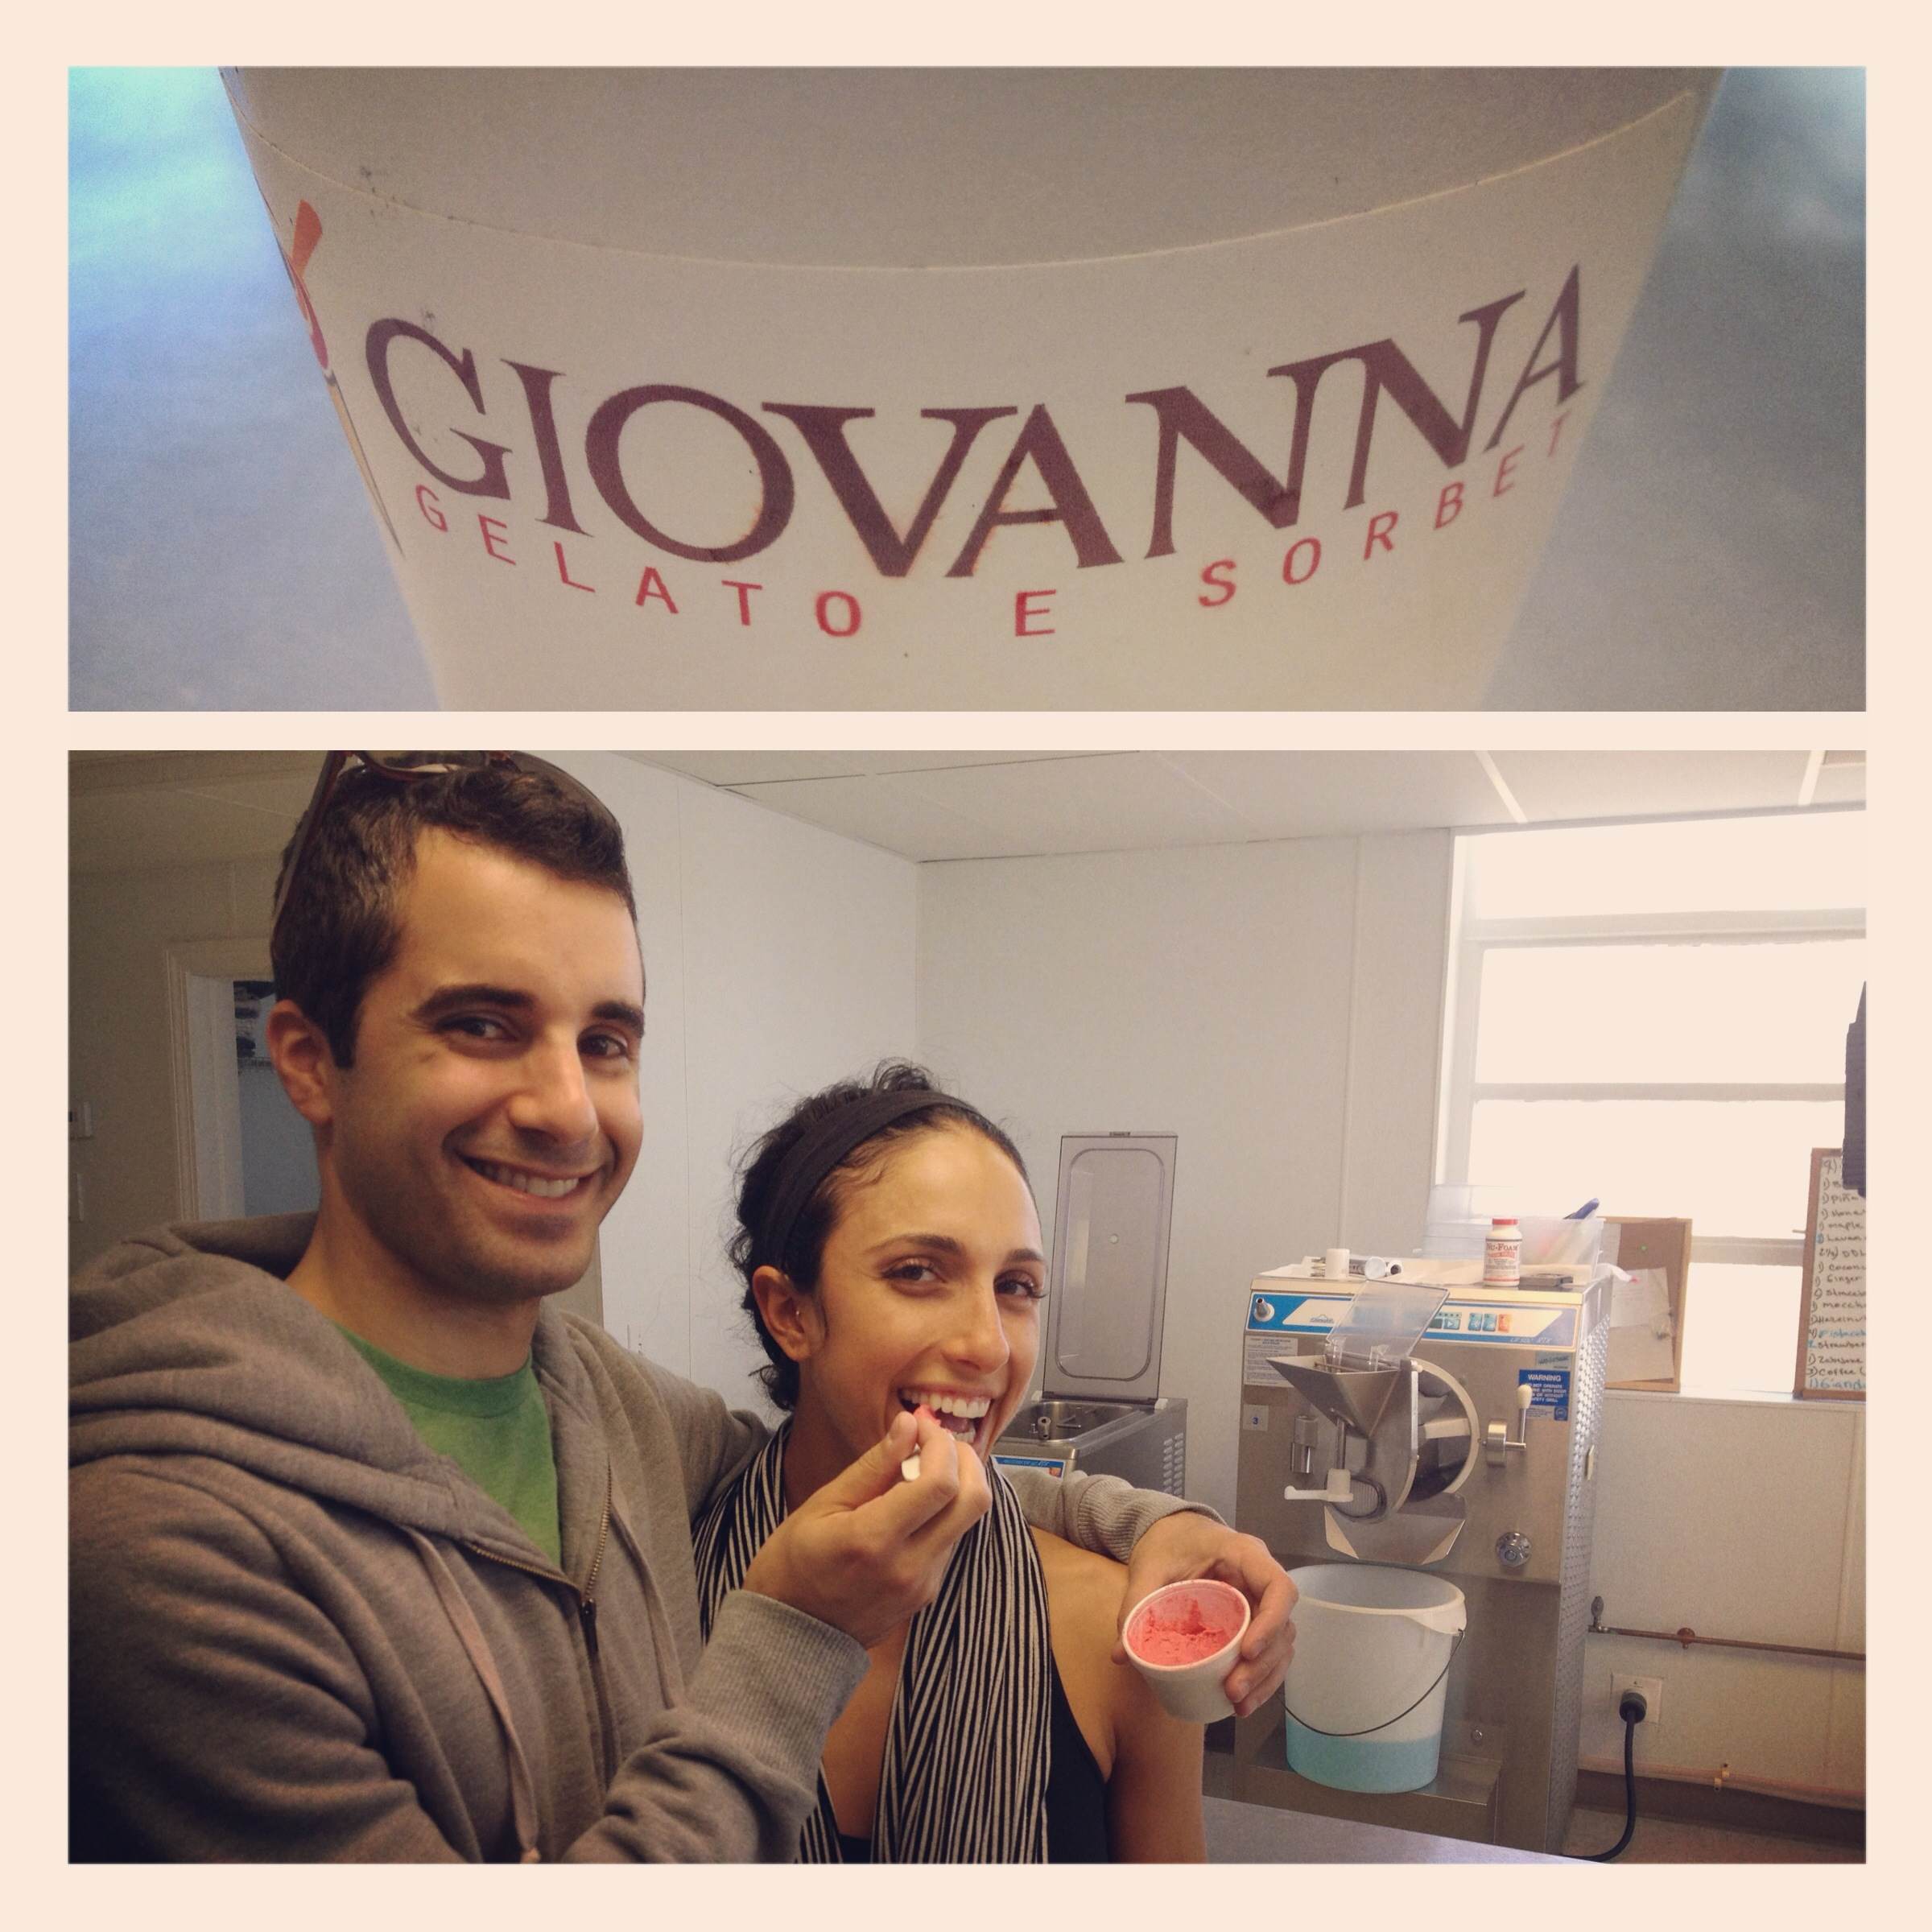
During dessert time I wanted something that was passed around. I got inspiration from my cousins wedding 5 years ago. There are certain things from certain weddings that you do not forget, and this was one of them. She had sorbet passed around on plastic sticks. I thought that gelato and sorbet passed around to the guests would be a nice treat. We did some research to find local gelato companies and then we did taste tasting to find the best. My mom and I would go to Whole Foods and test them out. We would literally go and buy 5 different flavors and brands of gelato and sorbet, sit in the store and test each one. We did not want it to melt and wanted to get the full effect, so we had to eat it right away! We finally ended up liking Giovanna the best! The day before the wedding Brandon and I picked up a large jug of chocolate gelato and raspberry sorbet.
Image
My uncle from California who once owned a restaurant and now runs a catering business brought us some cute mini cones along with gold painters pallets. I then had a client (who happens to work in the food industry) pick up the ice cream from storage (because there was no freezer at the venue) bring it to the venue and start scooping. The other employees of our caterer also helped. So there were a lot of people who made this (kind of) DIY project possible.

Image
Image
Anna's burrito
Image
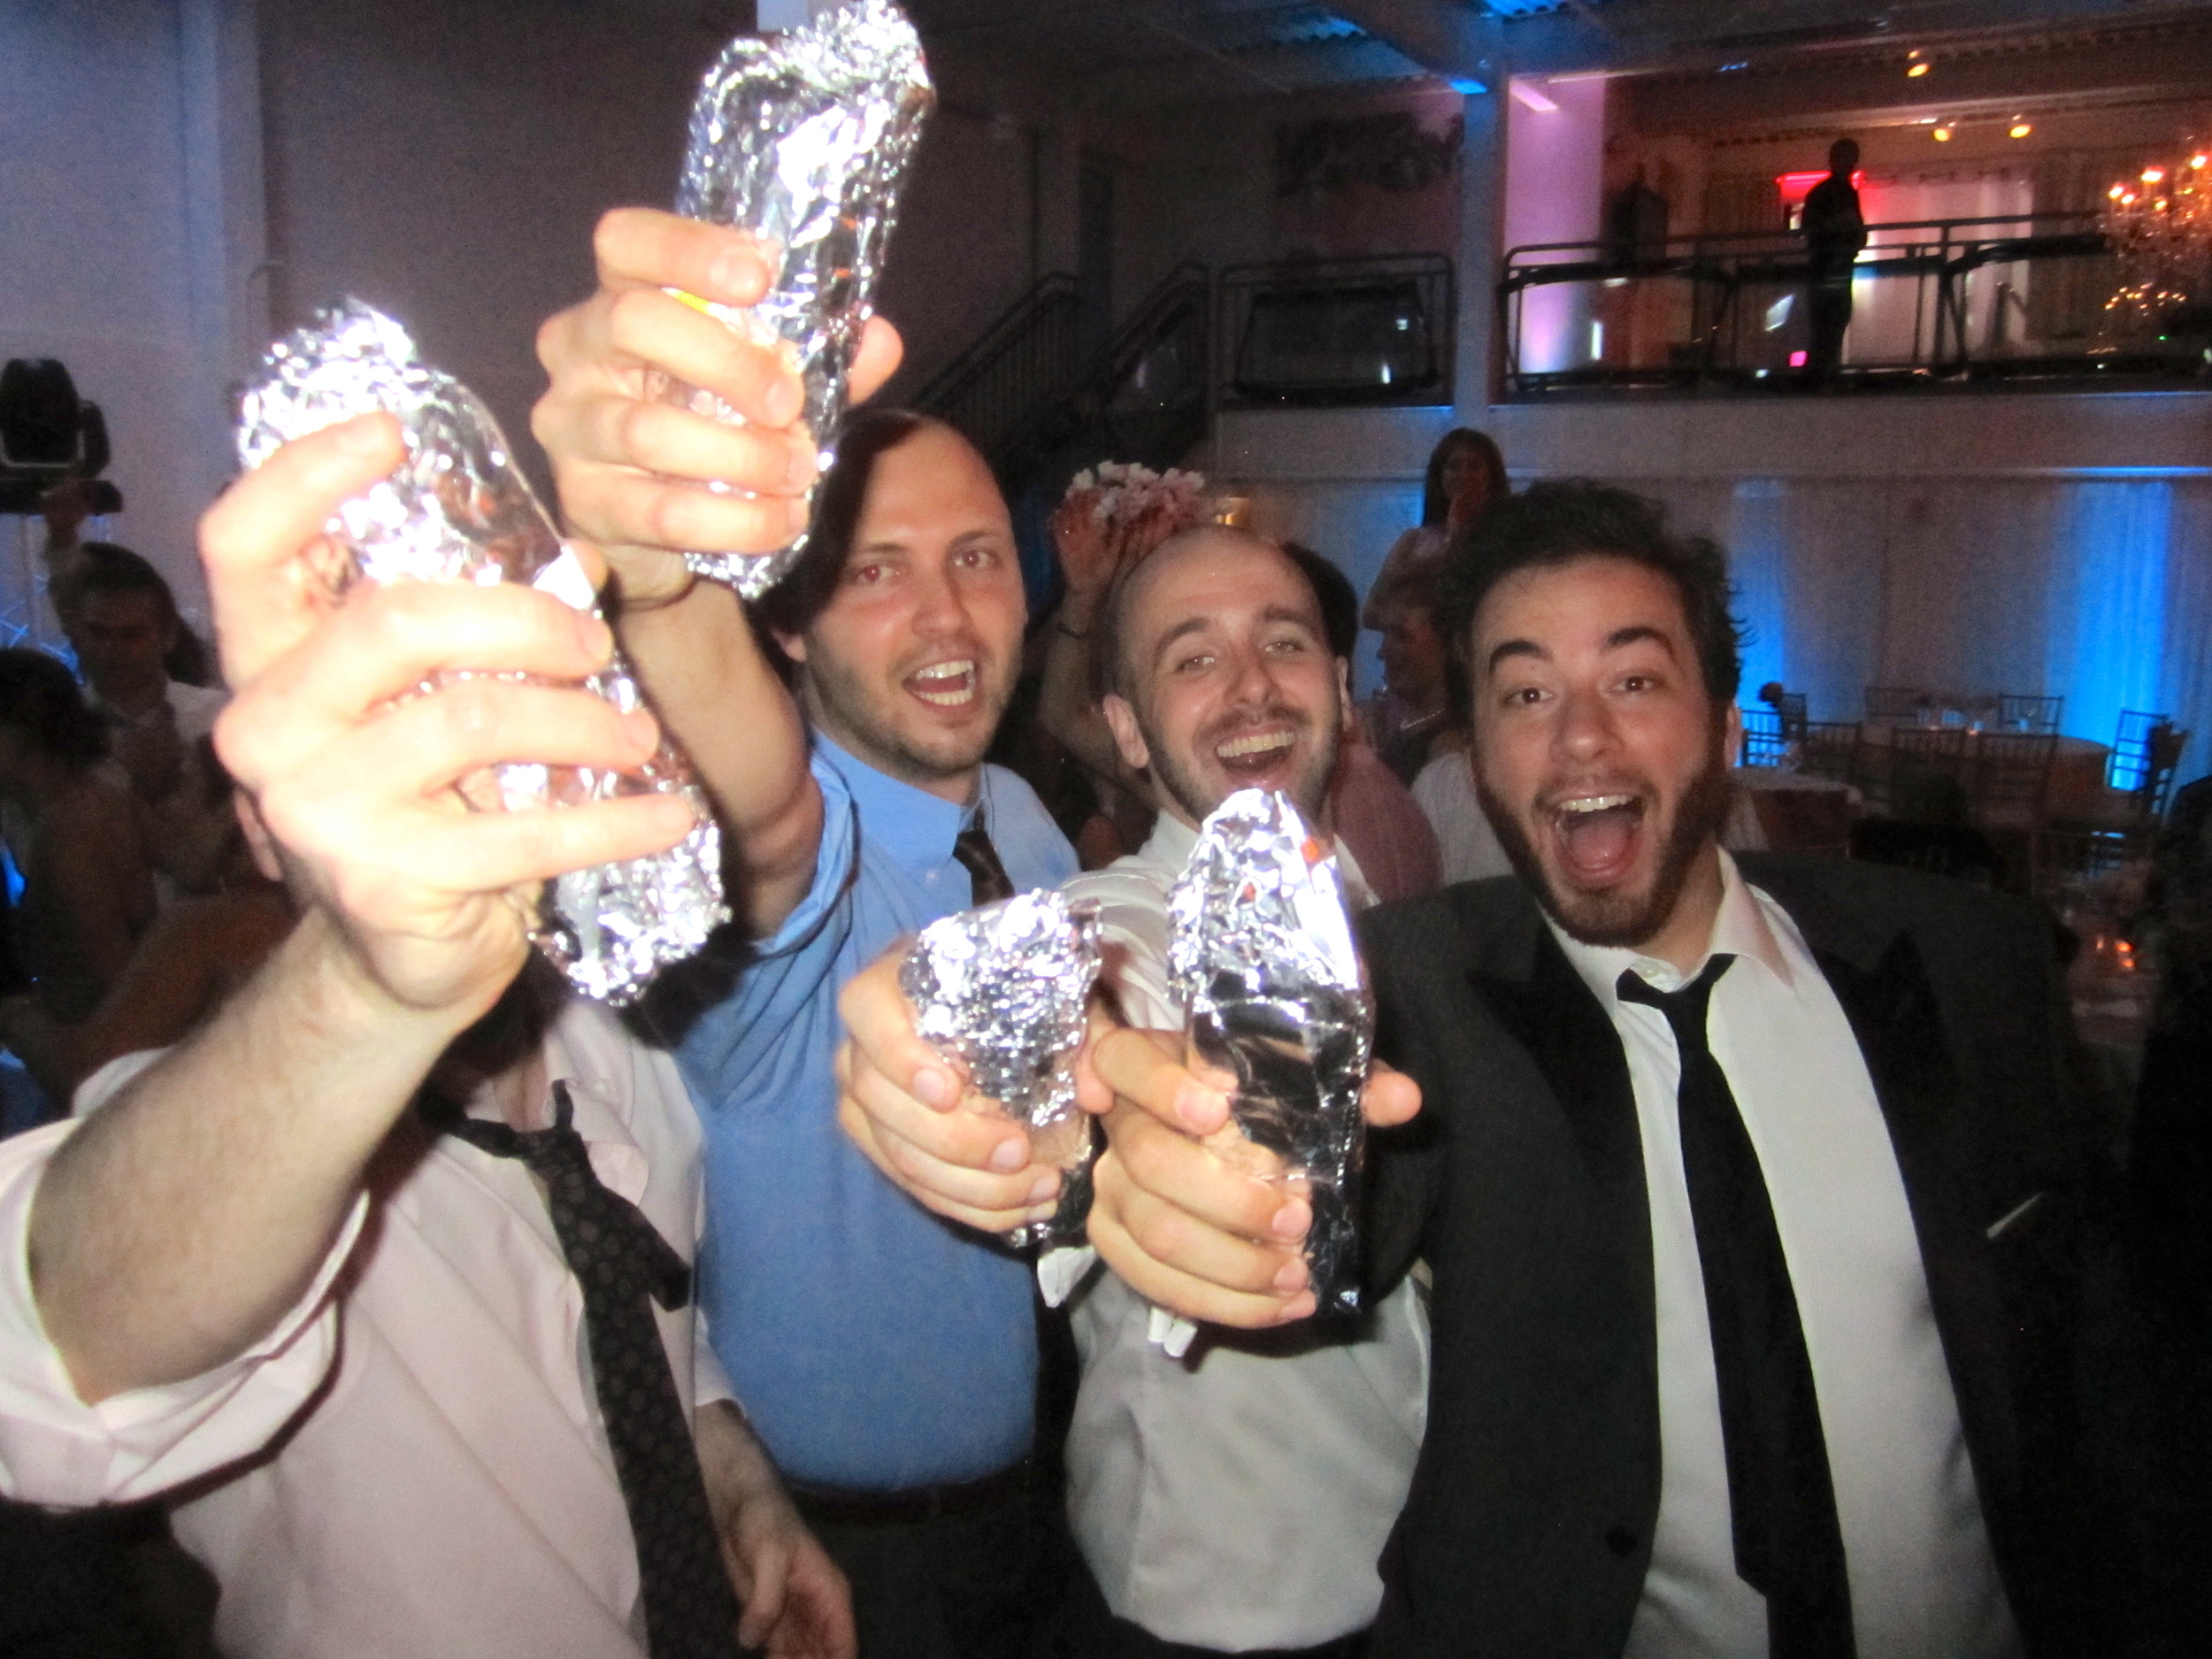
If you live in Boston I am sure you have heard of Anna's. It could be the best burritos place EVER. Anna's holds a special place in Brandon and his college friends hearts.
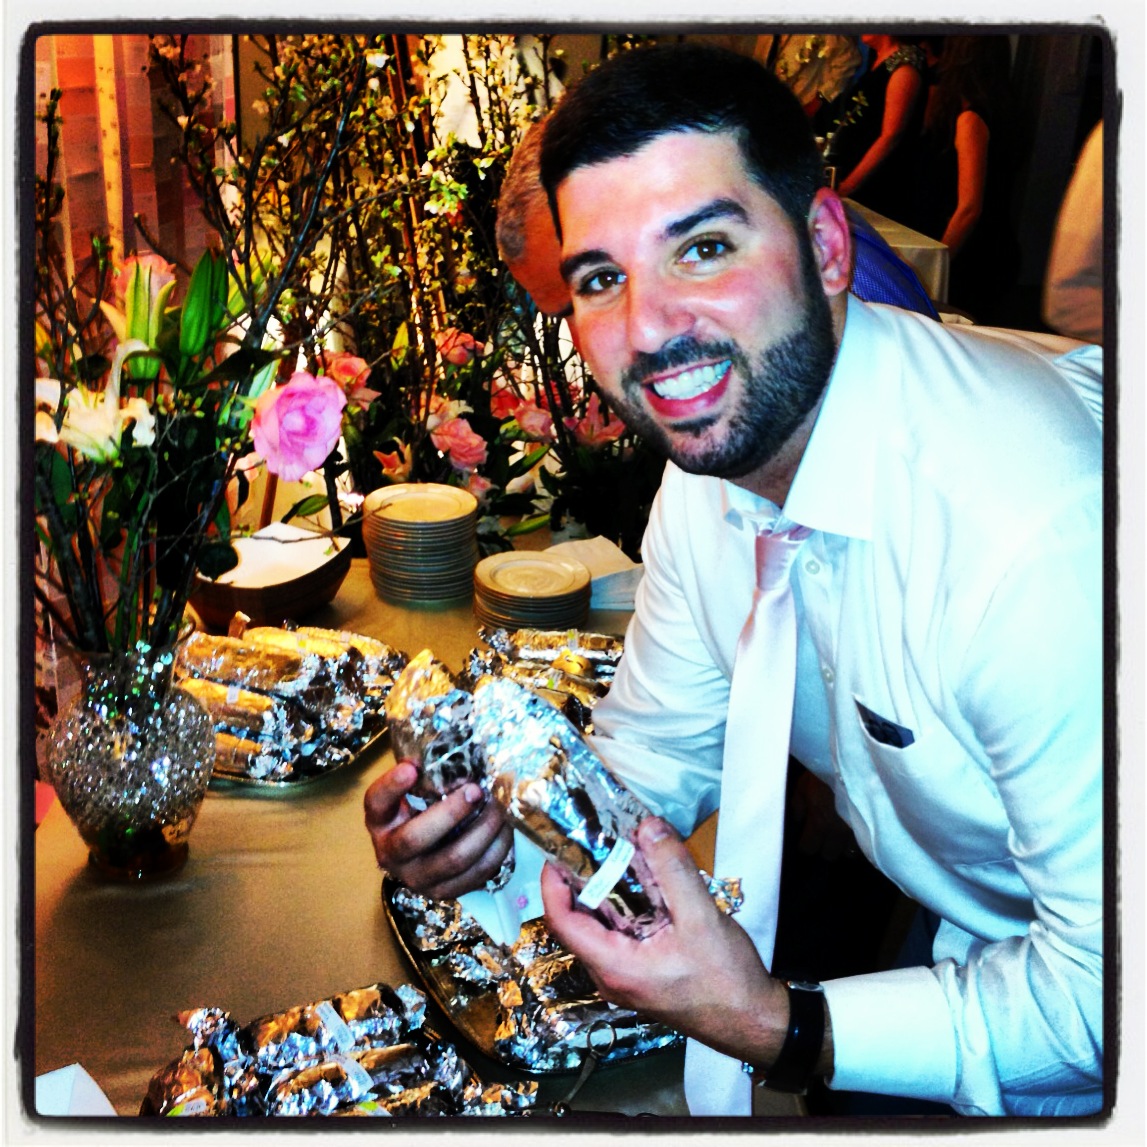
IMG_3324
So we thought it would be an awesome treat to have a huge delivery of Annas at the end of the night. This was a success, people loved it. Especially after a night of drinking and dancing, burritos sounds awesome.. RIGHT?
Below the groom enjoying his Annas with the paint chip wall behind him.

Image
All in all this was, thus far, the best night of my life. All the work leading up to it was the best part. All the planning, all the laughs and cries and fights and hugs and smiles. It is all about love.. and of course being crafty. Good luck with your projects. If you know a crafty friend, do not be afraid to ask for help, just make sure you compensate them somehow and show that you really appreciate what they are doing.
I hope this post has given you some inspiration to step outside the wedding box, and make that wedding SHINE YOU!
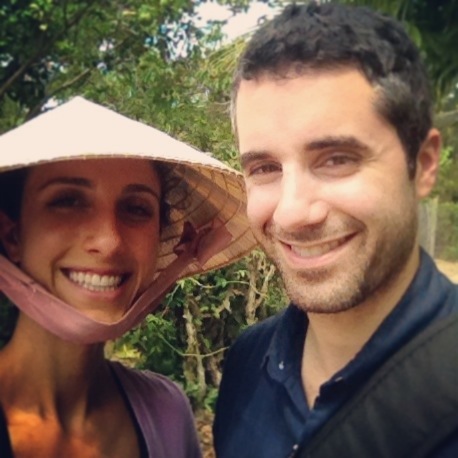
Vietnam for honeymoon
 After flying for a whole day we have arrived to Vietnam! So far the food here is awesome and I have been more adventurous than usual, even eating fried food! Pictured above is a fried elephant ear fish. We ate it wrapped with rice paper and veggies.
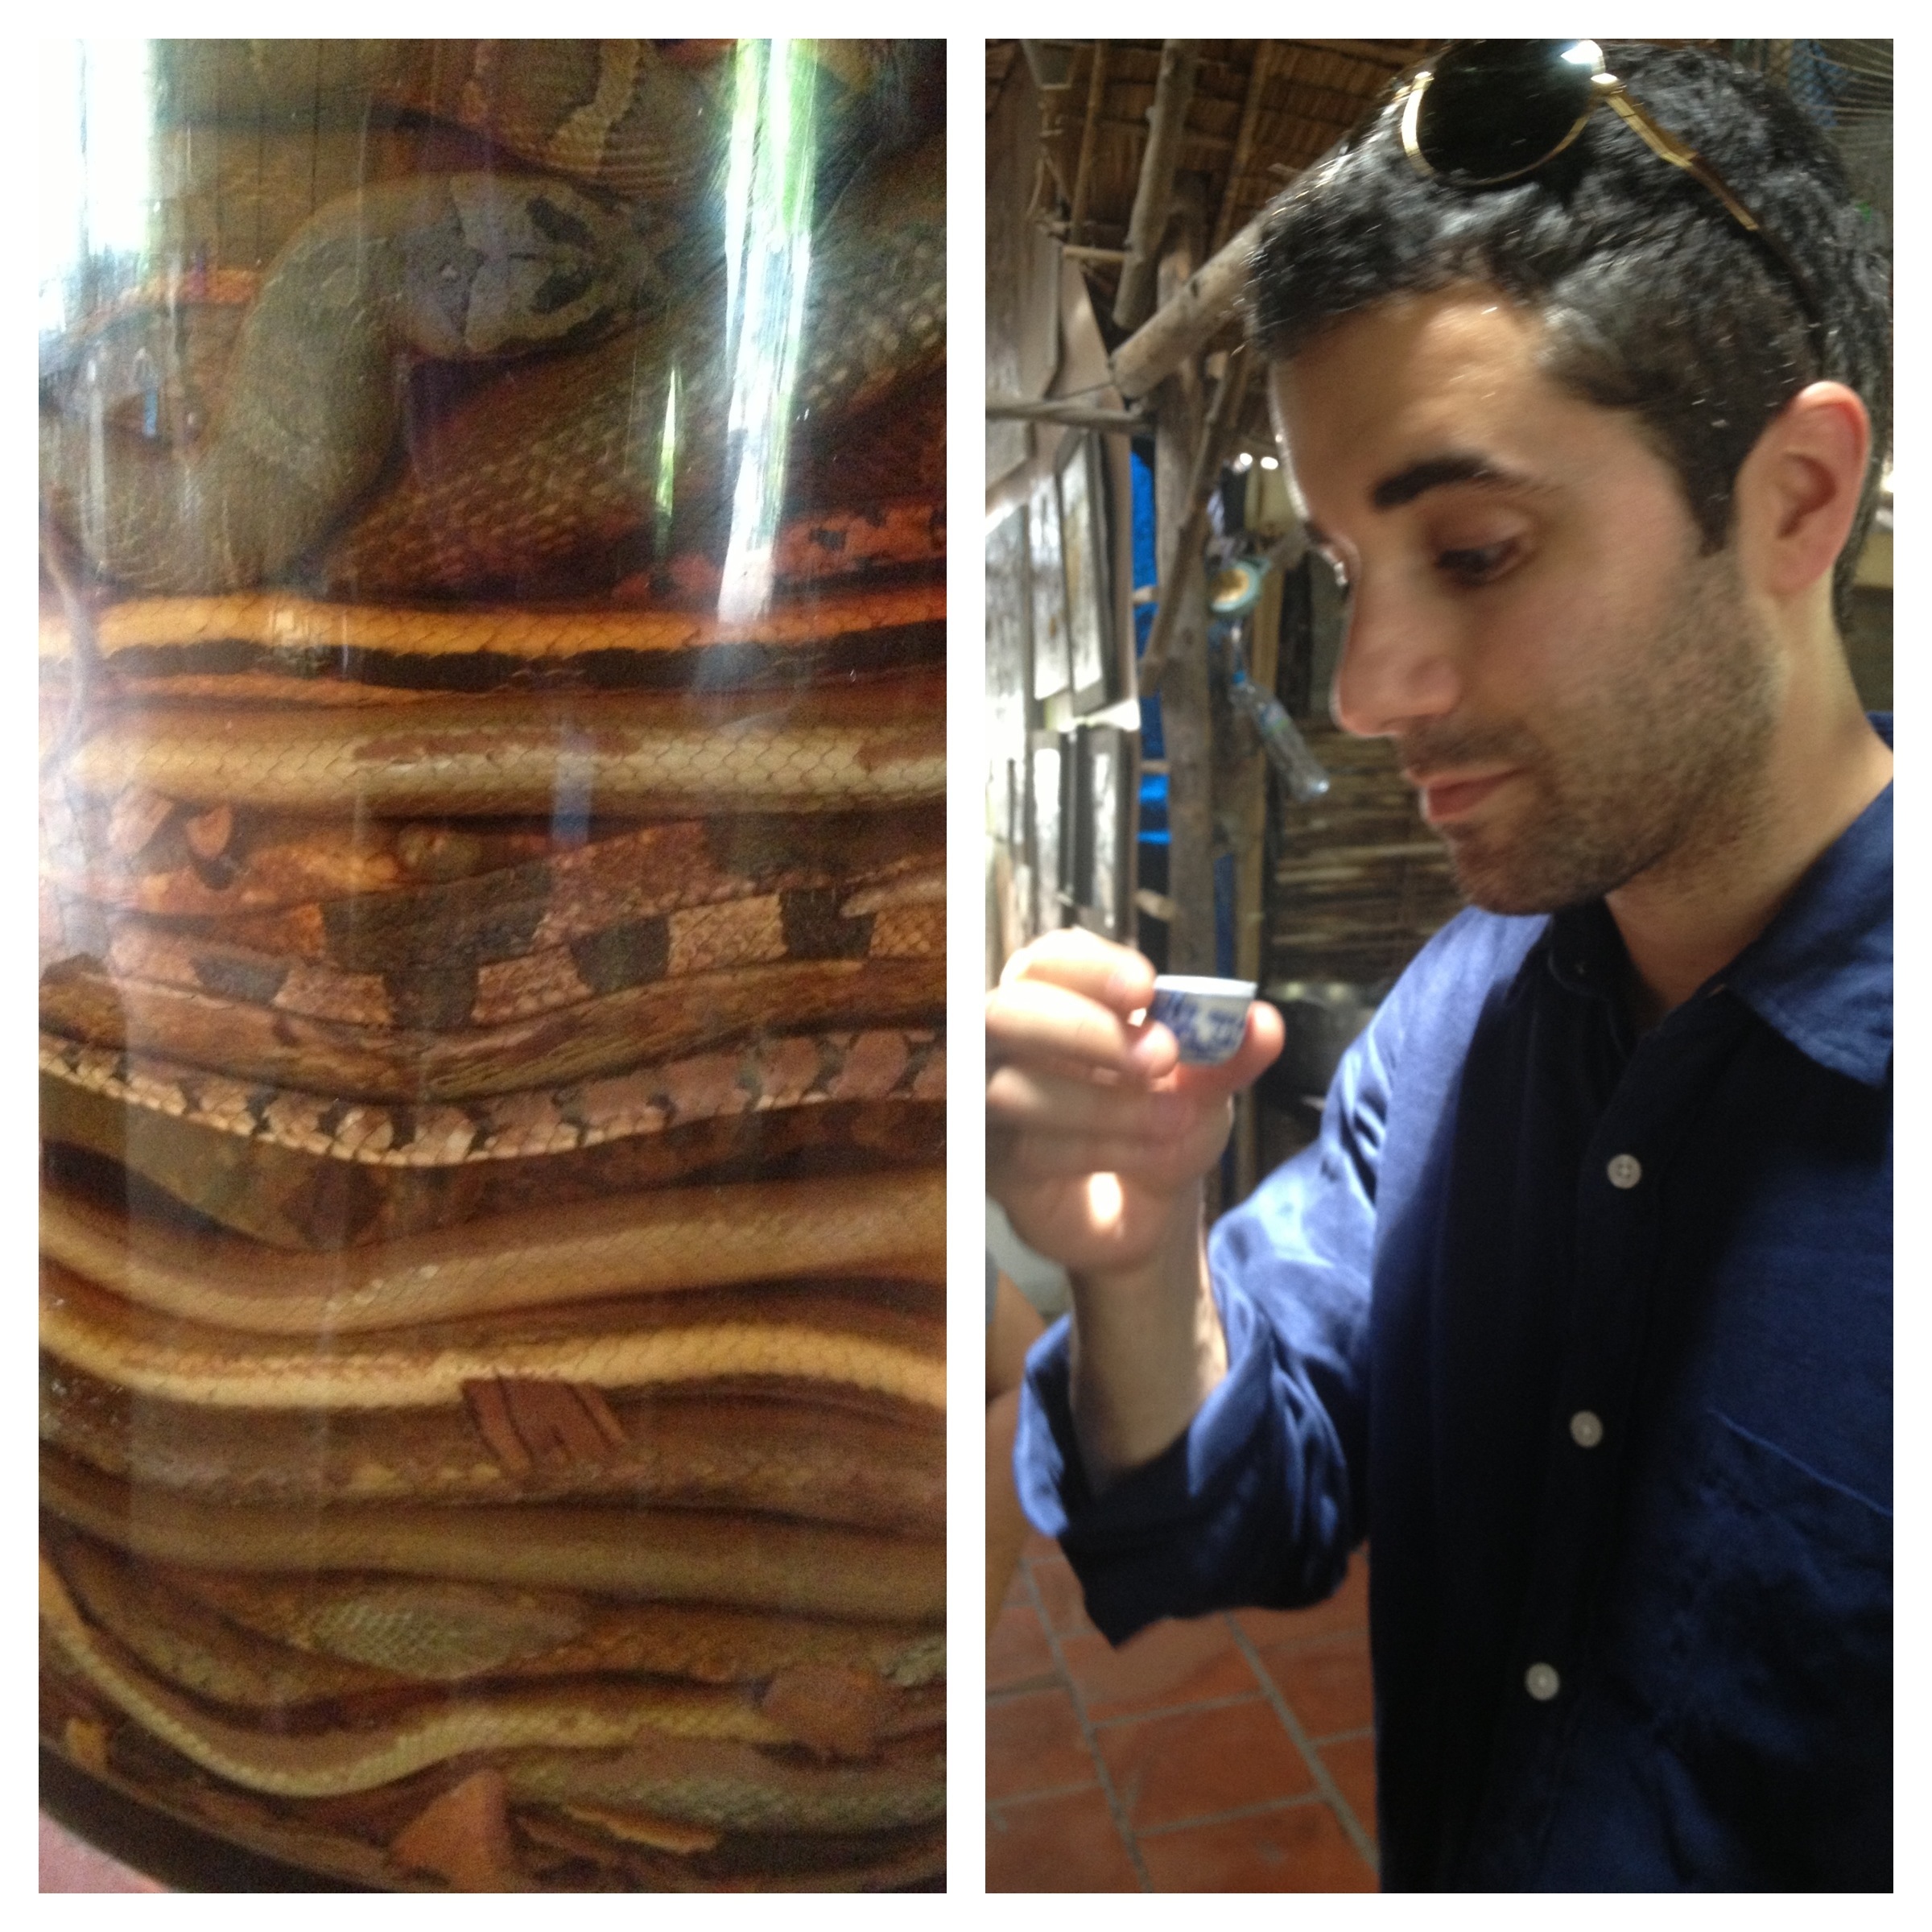
Today we went on a private river tour. We had multiple stops along the way, each stop showing us a bit of the Vietnamese culture.

We watched rice being turned into popped rice (kind of tastes like popcorn) and Brandon drank some snake wine, I passed on that!
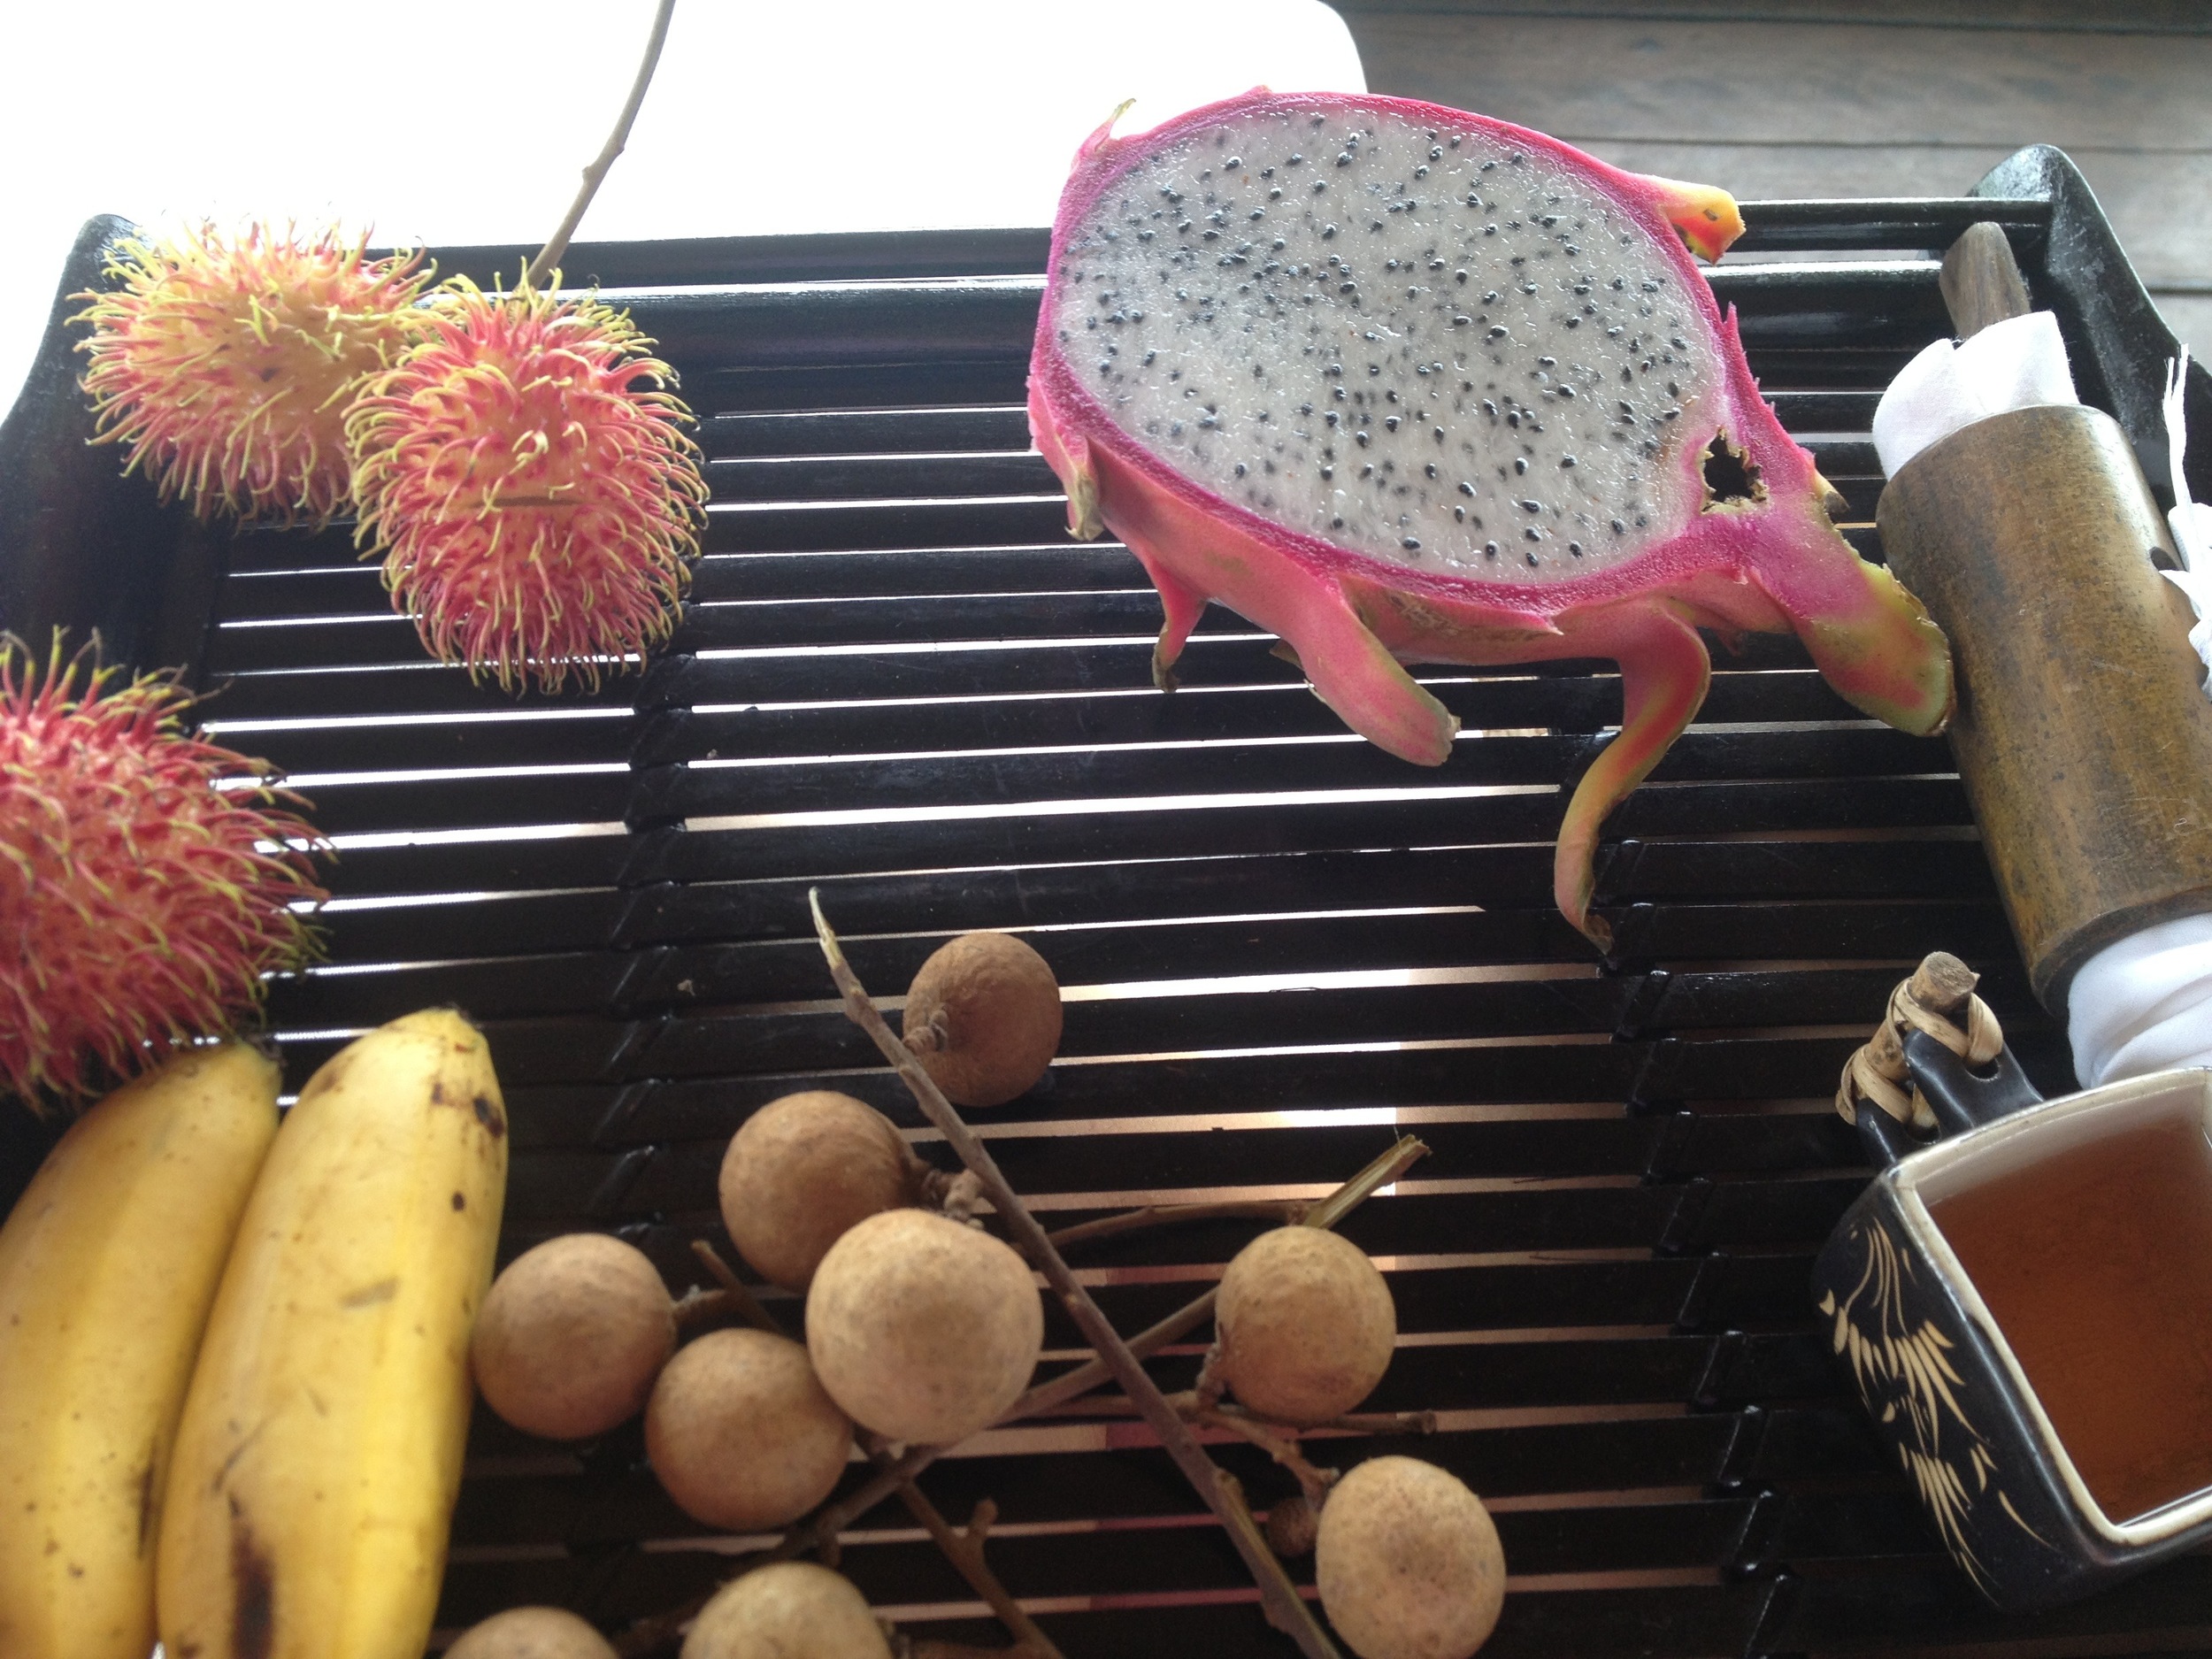
On the cruise they served us some cool exotic fruit. Dragon fruit, "red hairy egg" and "dragon eye". Yumm. Wish we could grow these in the USA.
Tomorrow we are going to the local market to get some produce then we will be taking a cooking class and making lunch! Can't wait. Will update more tomorrow. Xin chào!
Xin chào is the formal way of greeting and saying hello or goodbye.
Wegmans in Virgina
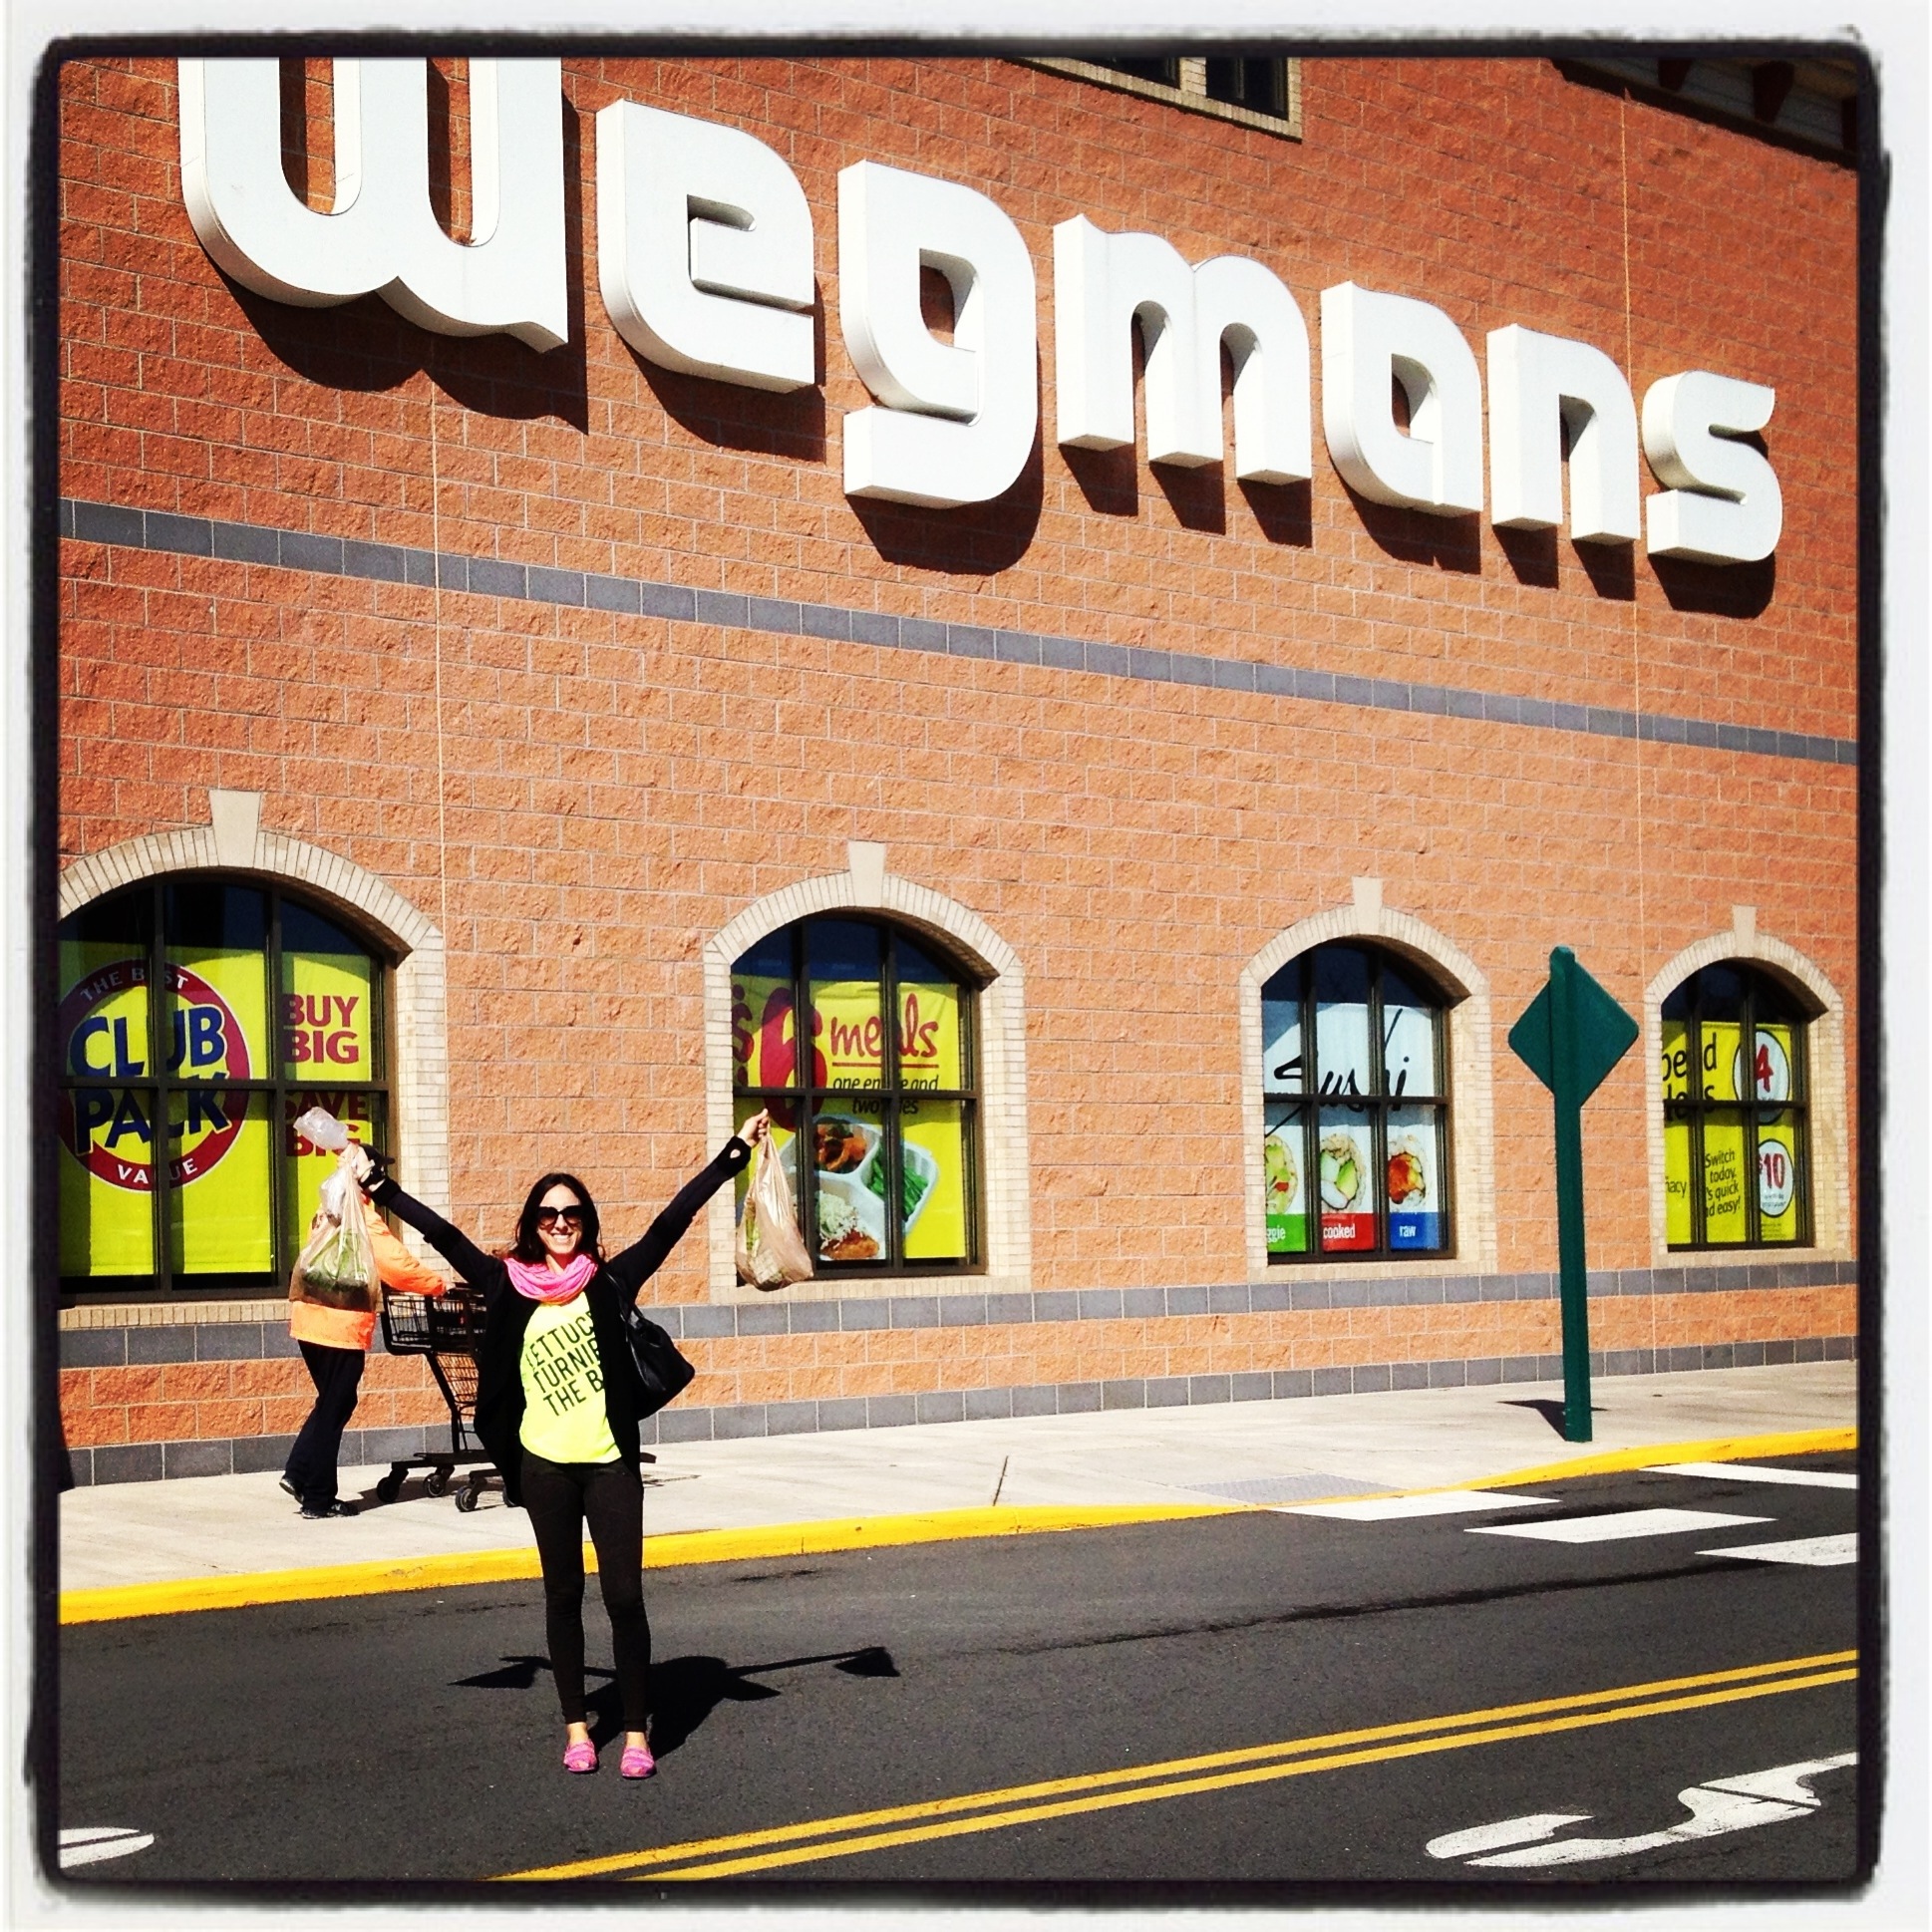
Hi all. I am on my to Virginia!! I am in a car and have some time on my hands so I am going to write out this whole post on my phone and drive at the same time!! Just kidding (about the driving).
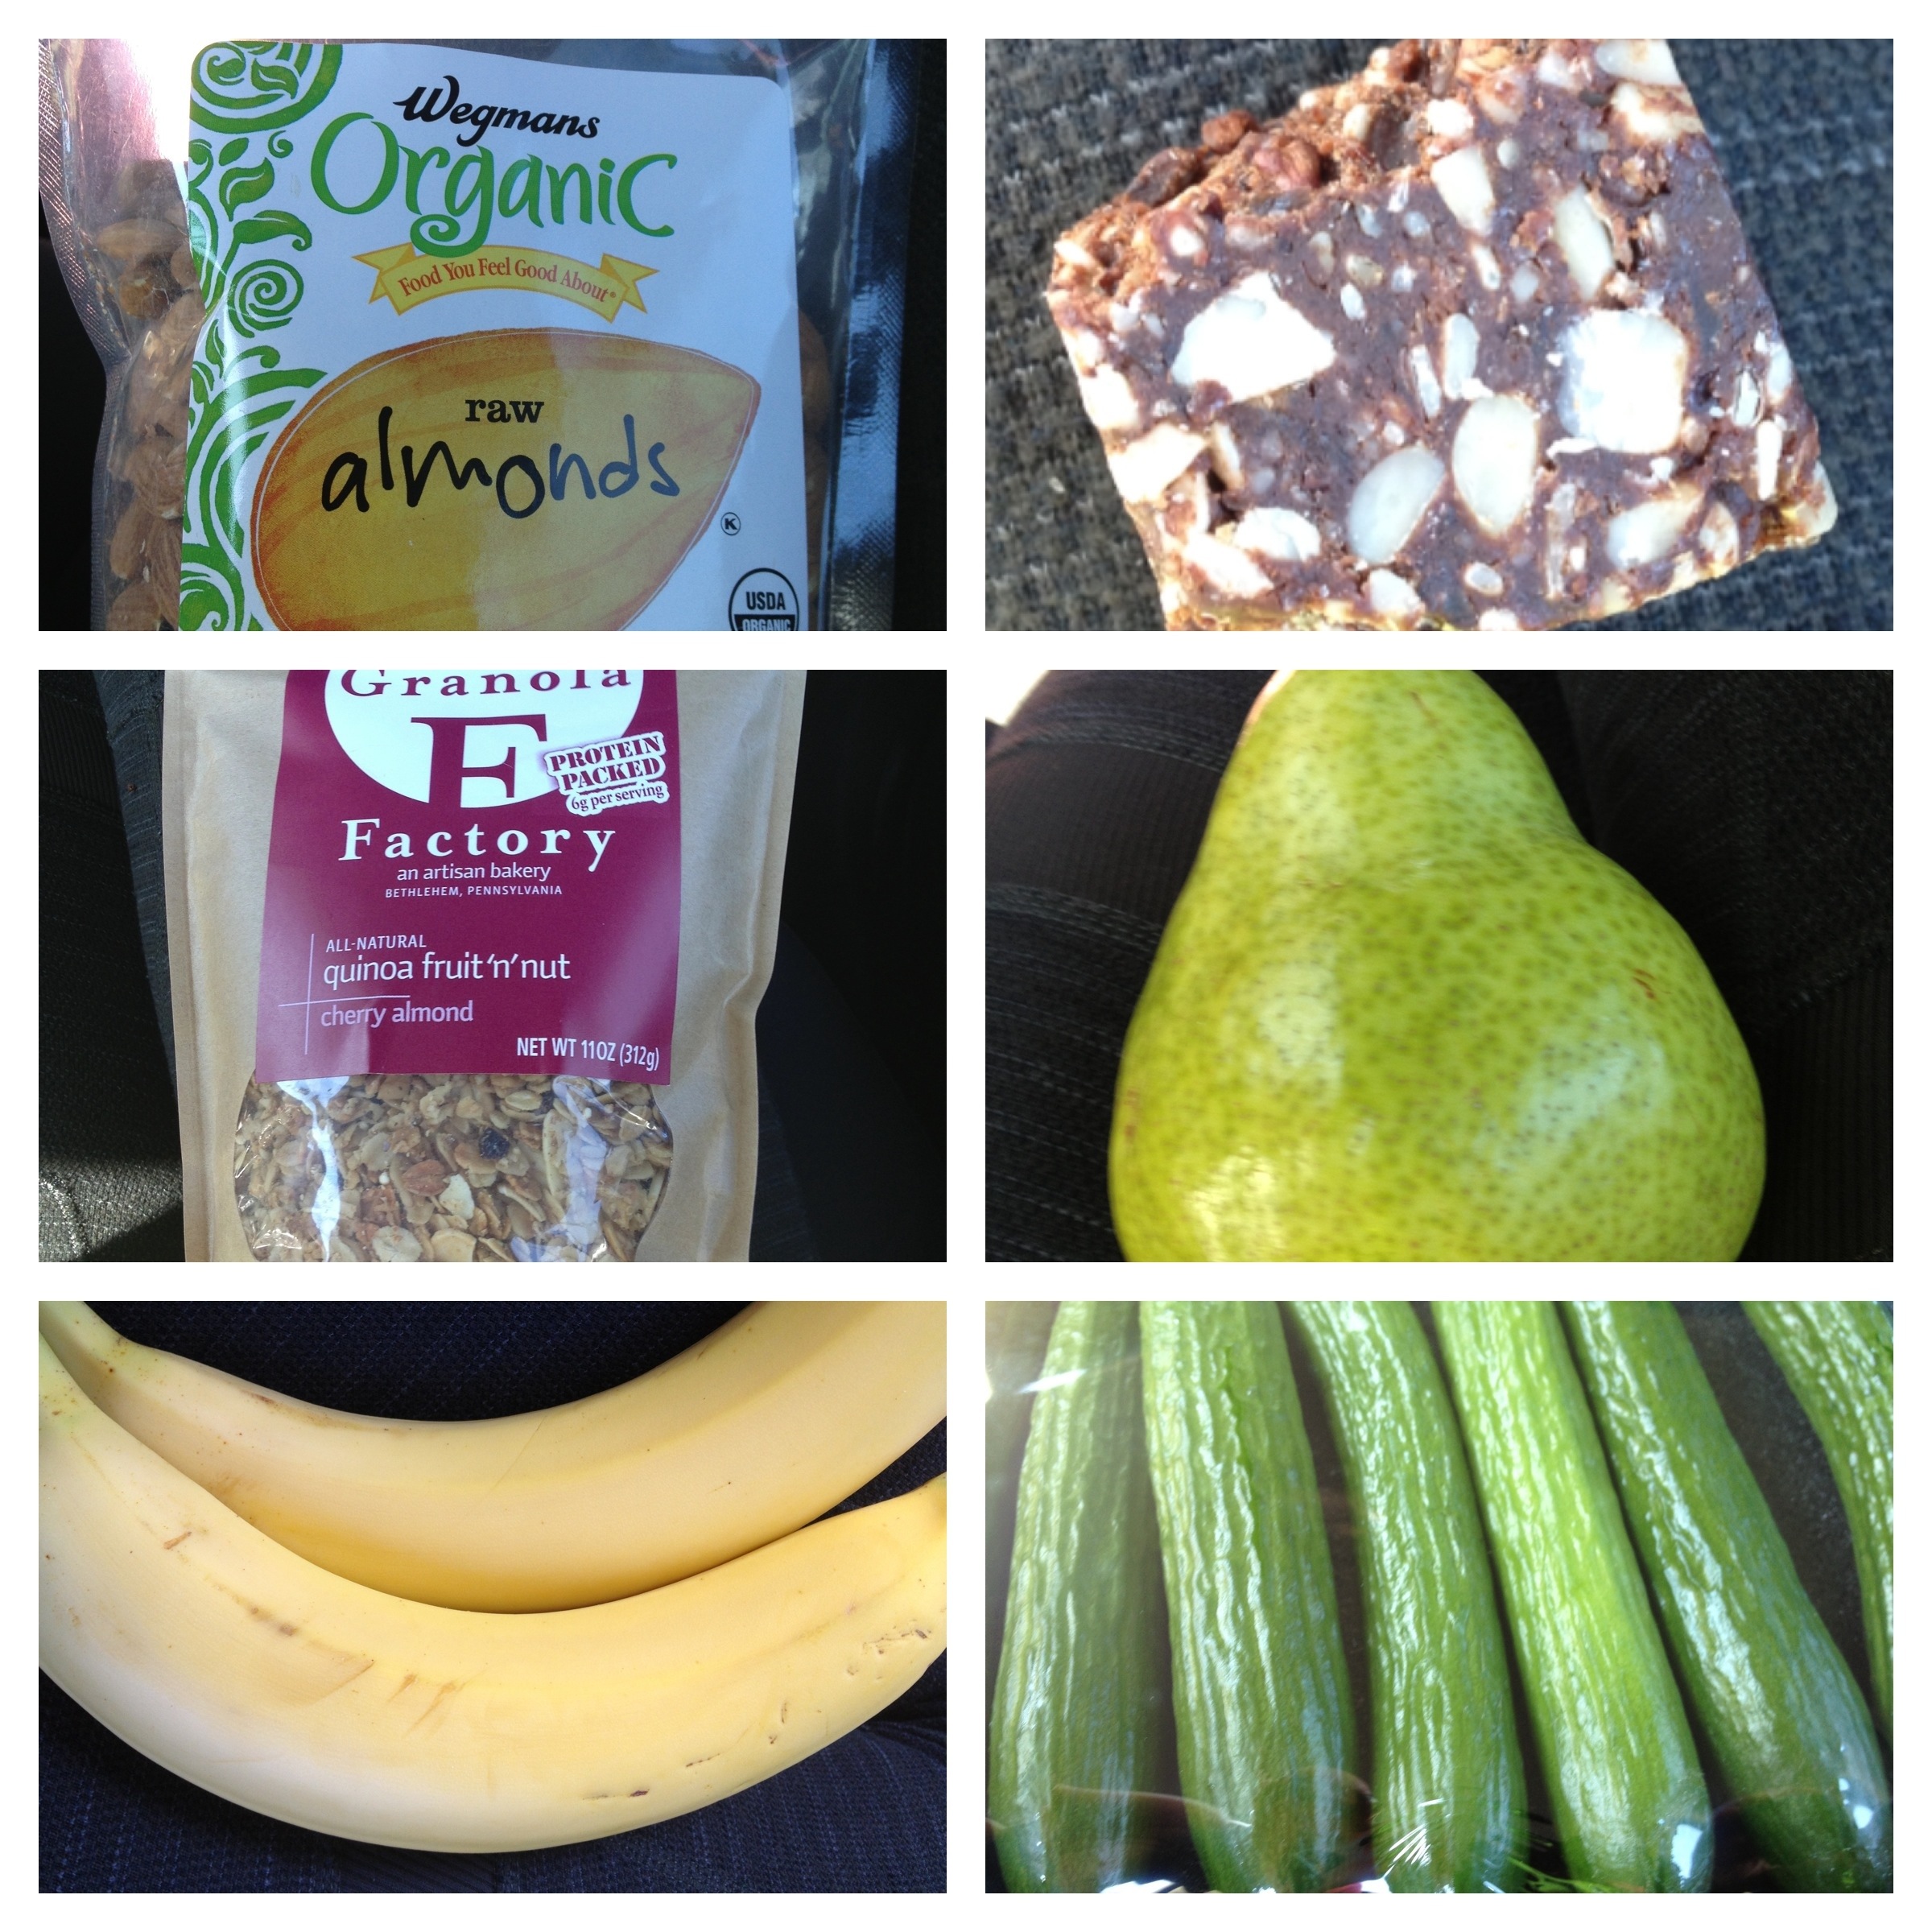
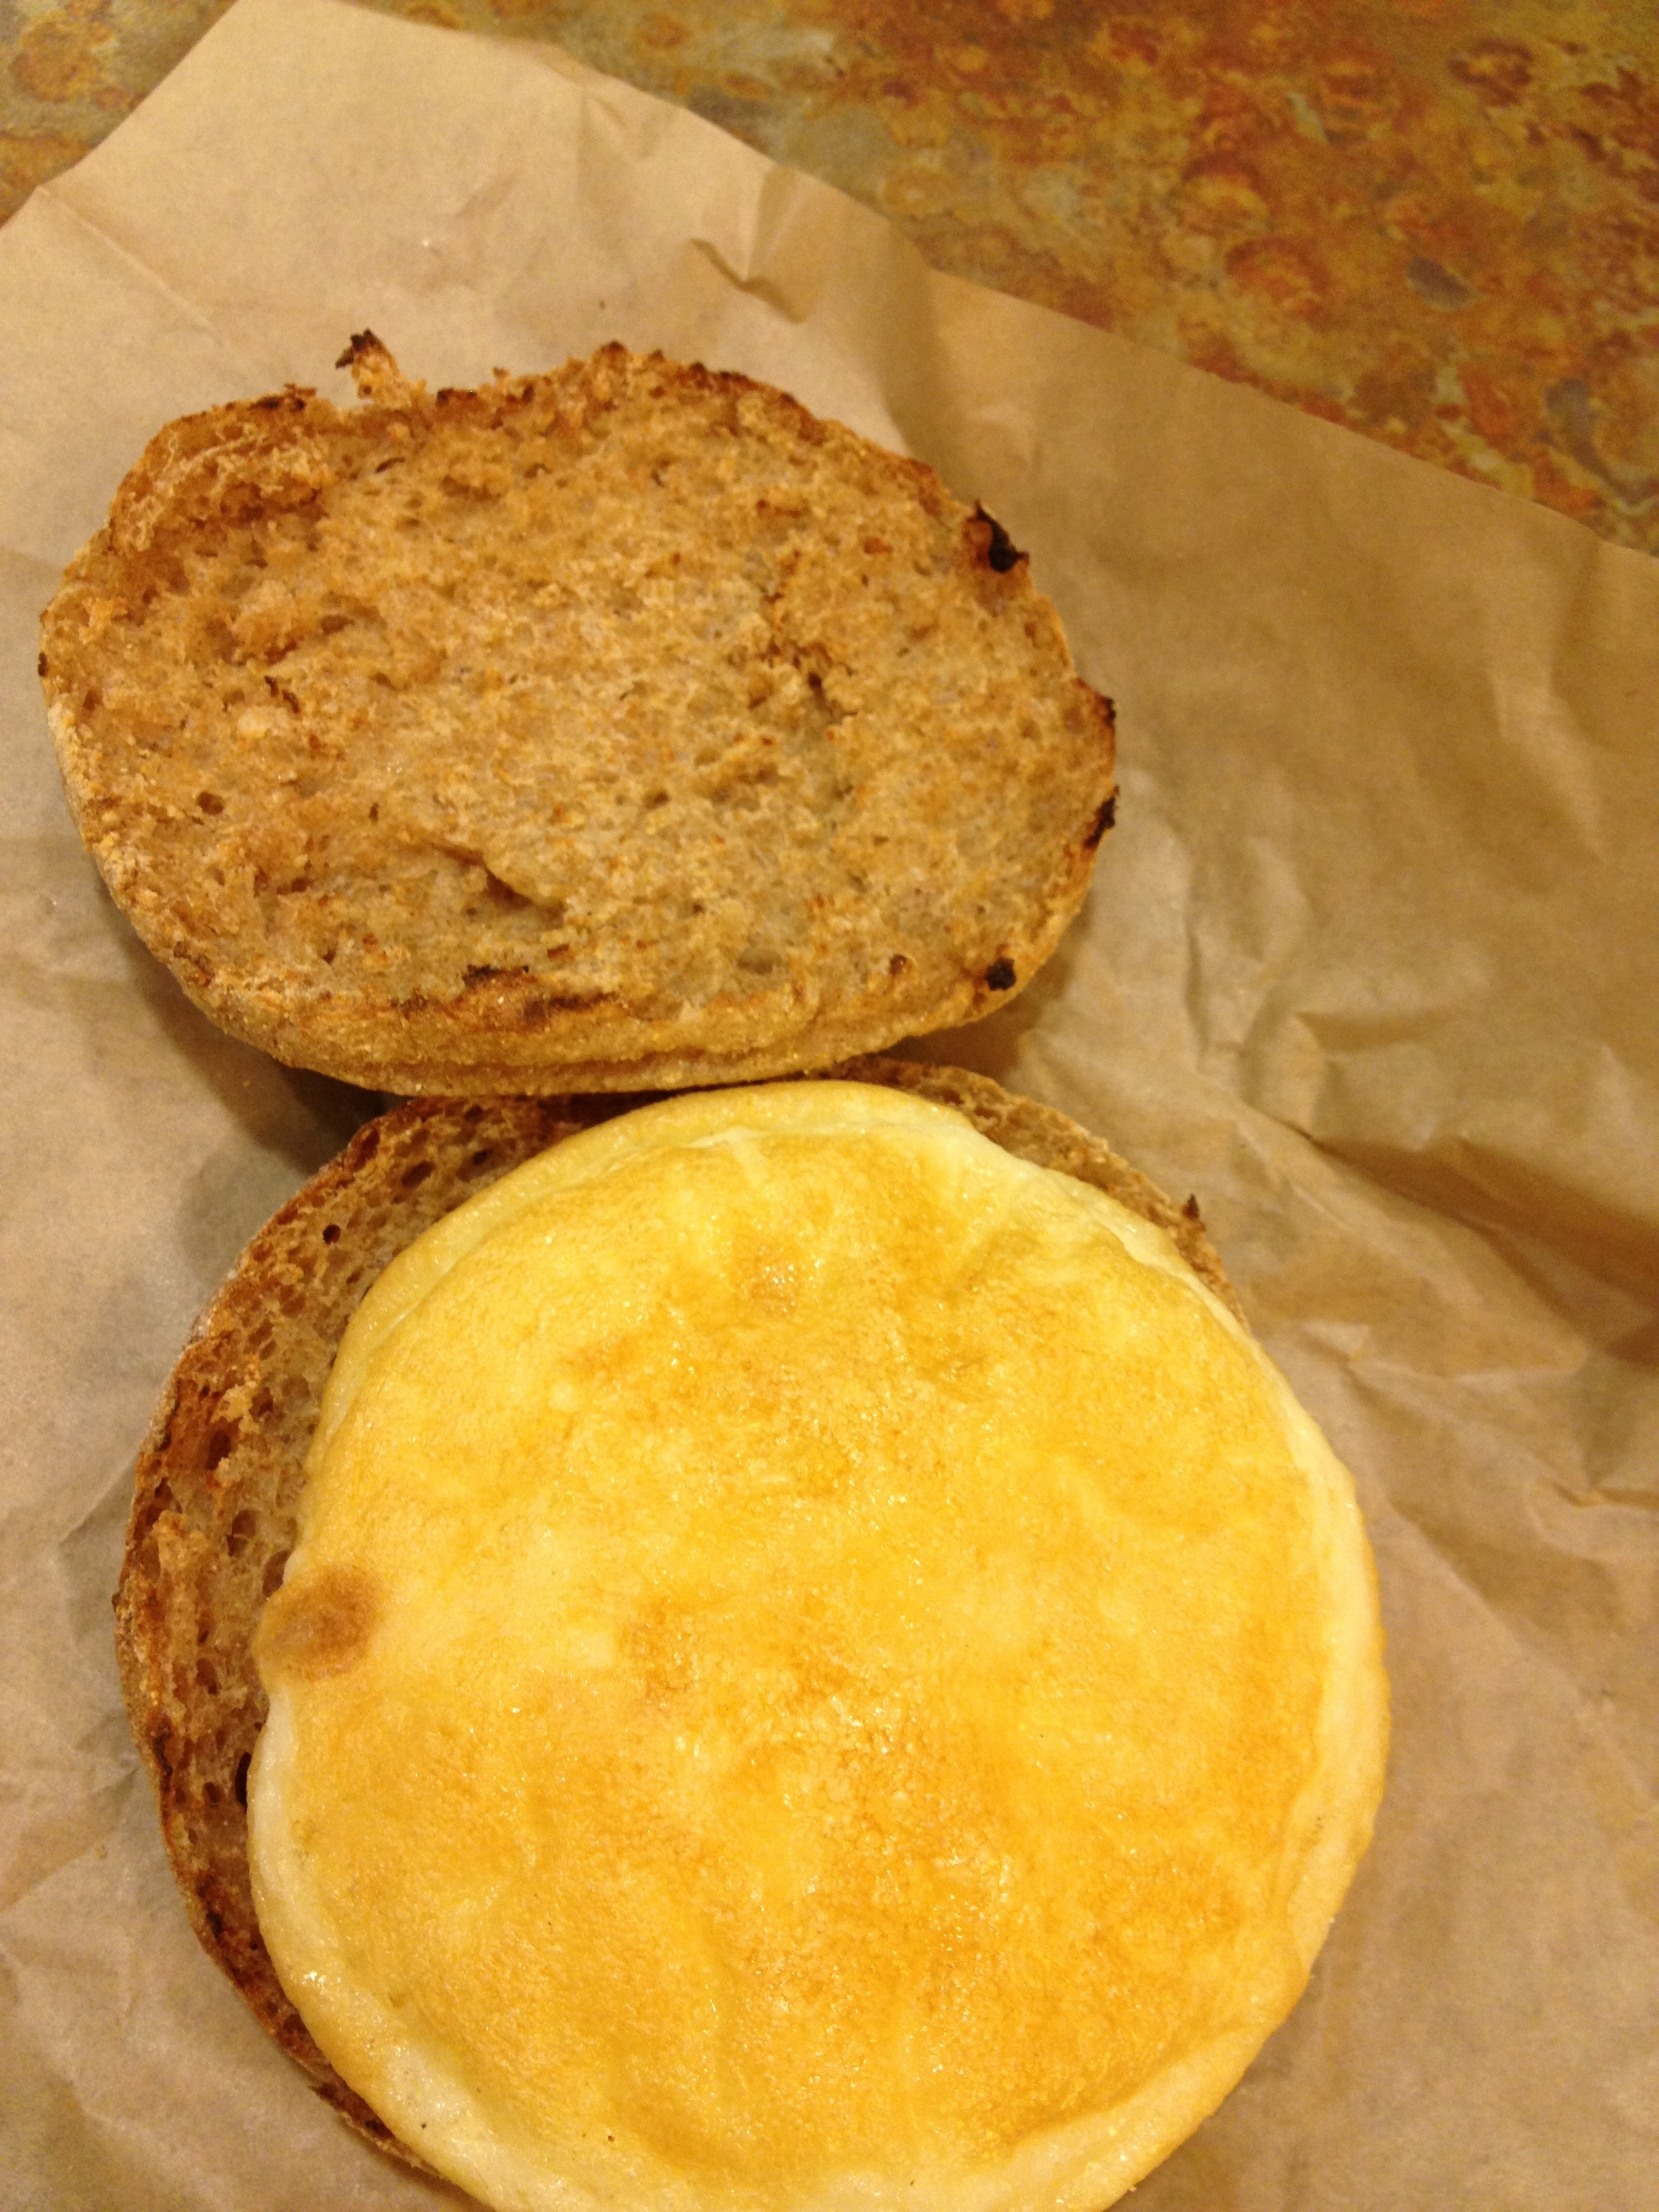
Whenever I travel I try to stop at a grocery store along the way to grab some healthy snacks that do not take preparation and can stay without refrigeration. I stopped at Wegmans food market (first time in there!) and saw they had breakfast sandwiches. Most of the sandwiches were already prepared with either cheese or bacon or both. I asked if they could make me an egg white on a whole wheat English muffin, no cheese or meat. It was simple and hit the spot.
After my breakfast I walked around and explored the store a little bit more. There was so much produce and the store just kept going and going. I really wanted to buy a green juice, but couldn't find any. I am not sure if I missed them, but I was a bit disappointed at their juice selections.
I bought bananas, cucumbers, granola, almonds, cacao energy bites and a pear! Enough snacks to last me the weekend.
Do you have a Wegmans in your area? Supposedly one is opening in Boston!
Have a superb weekend :)